2008-2012 Honda Accord ajtóműködtető csere
Ebben a cikkben: Végigvezetjük a 2008–2012-es Honda Accord hibás ajtóműködtetőjének cseréjéhez szükséges lépéseket.
- Szükséges eszközök
- Szükséges alkatrészek
- 1. lépés:Távolítsa el az ajtópanelt
- 2. lépés:A törött ajtóműködtető eltávolítása
- 3. lépés:Az új ajtóműködtető előkészítése
- 4. lépés:Az indítószerkezet és az ajtópanel újratelepítése
Projekt nehézség:Könnyű
Becsült idő:1,5 óra (vagy kevesebb)
A 2009-es Honda Accord vezetőoldali ajtóműködtetője körülbelül 6 hónappal ezelőtt kezdett némi zajt kiadni záráskor és kinyitáskor. Ez különösen akkor volt észrevehető, amikor az ajtókat becsukták, és az autó gurulni kezdett – az automatikus zár. Kicsit nyögdécselésnek hangzott (jobb kifejezés híján).
Végül körülbelül két héttel ezelőtt nem reagált a zárolásra és szakaszos feloldásra. Észrevettem, hogy valahányszor eltávolodtam a féklámpától, az megpróbál reteszelni – féklámpa a féklámpa után. Rájöttem, hogy a vezetőoldali ajtó nem záródik, és az automatikus zárás funkció mindig megpróbálta bezárni, valahányszor az autó gurulni kezdett. Ez volt a sorom a cseréhez.
Ebben a cikkben végigvezetem az ajtópanel eltávolításának és a Honda ajtó működtetőjének cseréjének lépésein. Valójában elég egyszerű. Ne feledje:a helyes gyakorlat és a biztonságos megőrzés érdekében ne felejtse el kihúzni a jármű akkumulátorának negatív oldalát minden elektromos munka előtt, hogy elkerülje a biztosítékok kipattanását vagy az autó elektromos károsodását!
Szükséges alkatrészek
Valójában csak egy rész van (vagy kettő, ha két ajtót csinálsz):
- Vezetőoldali hajtómű a 2008-2012-es Honda Accordhoz – 37 USD
- Utasoldali hajtómű a 2008-2012-es Honda Accordhoz – 32 USD
Szükséges eszközök
Ez a projekt meglehetősen egyszerű és egyszerű volt, és csak néhány eszközt igényel:
- Phillips csavarhúzó
- laposfejű csavarhúzó
- 10 mm-es csavarkulcs vagy foglalat és kilincsmű
- Műanyag feszítőeszköz
- Szuper ragasztó
- Magasítószalag
1. lépés:Az ajtópanel eltávolítása
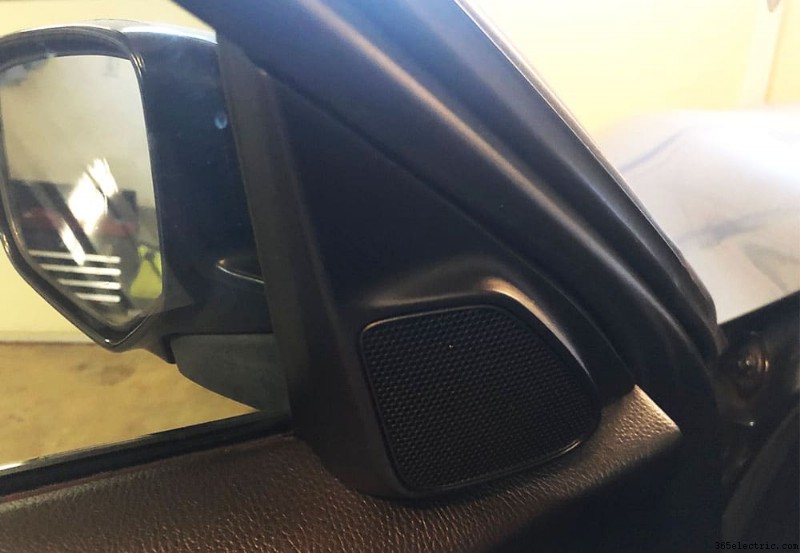
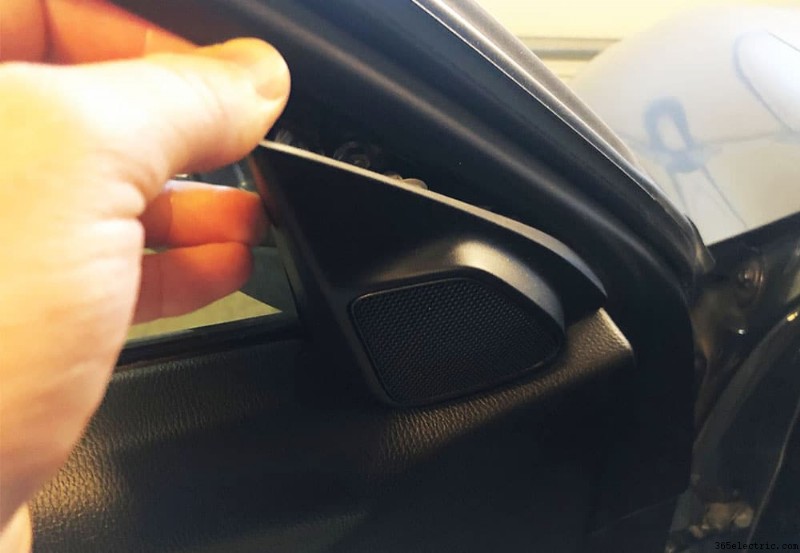
Az első dolog, amit meg kell tennie, hogy távolítsa el az ajtópanel csavarjait, majd pattintsa ki és távolítsa el az Accord ajtópaneleket. Ehhez kezdje az ajtó felső oldalán található magassugárzóval. Helyezze ujjait az ablak és a magassugárzó panel közé, és óvatosan húzza meg. Egyetlen klip található mögötte, így viszonylag könnyen leszedhető. Miután leválasztotta, húzza ki a magassugárzó dugóját, és tegye félre a magassugárzót.

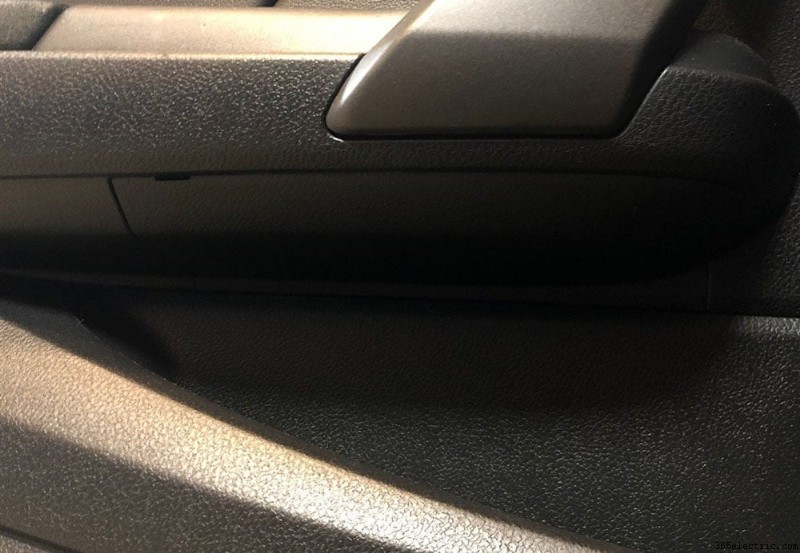
A magassugárzó eltávolítása után lépjen le az ajtókilincshez. Az ajtókilincs mögött egy díszburkolat található, amely három csavart takar. A műanyag burkolat tetején egy kis kapocs látható. Egy kis laposfejű csavarhúzóval nyomja be a kapcsot, és húzza le a panelt, hogy szabaddá váljon a három ajtócsavar. Csavarja ki mind a három csavart, és helyezze őket oldalra, amikor visszahelyezi az ajtót.
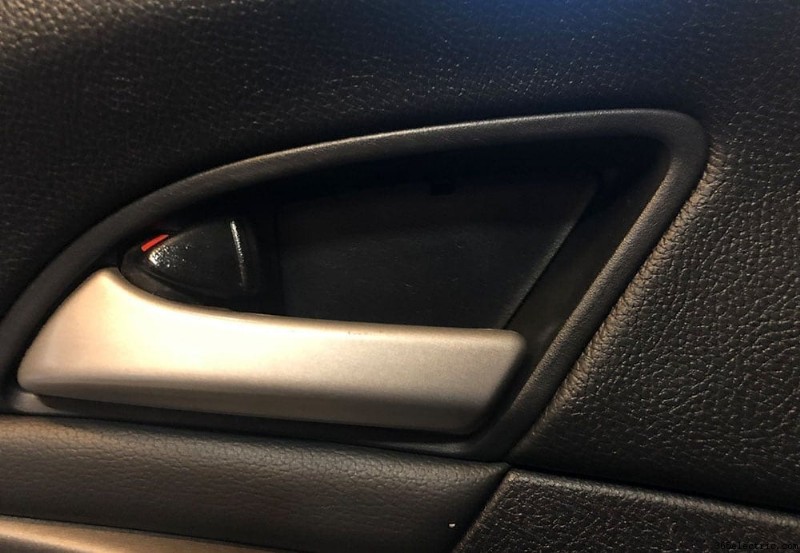
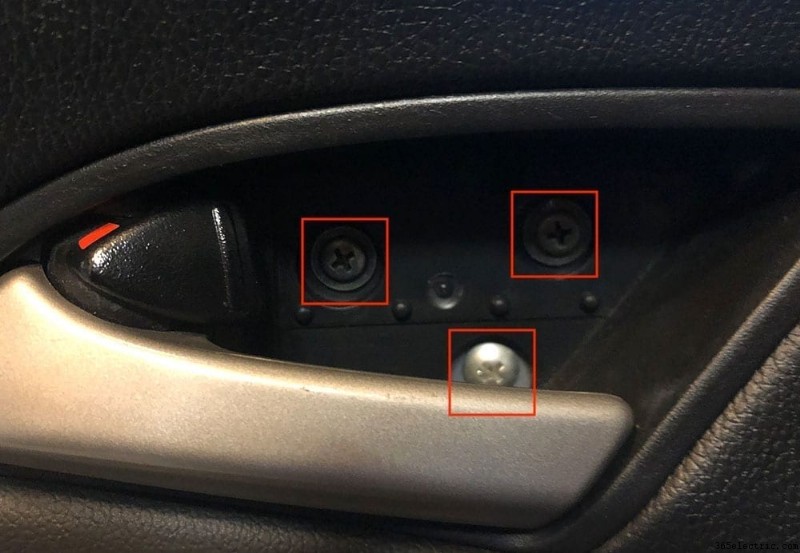
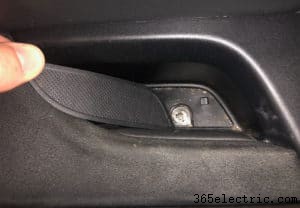
Az ajtó kartámaszán és kilincsén van még egy csavar, amit el kell távolítani. A csavar egy gumiszerű burkolat alatt található, amely az ajtókilincs területének alján található. Lapos fejjel ékelje be a sarok közé, és emelje ki a fedelet, hogy hozzáférjen az alatta lévő csavarhoz. Ezután csavarja ki ezt az egyetlen ajtópanel csavart.
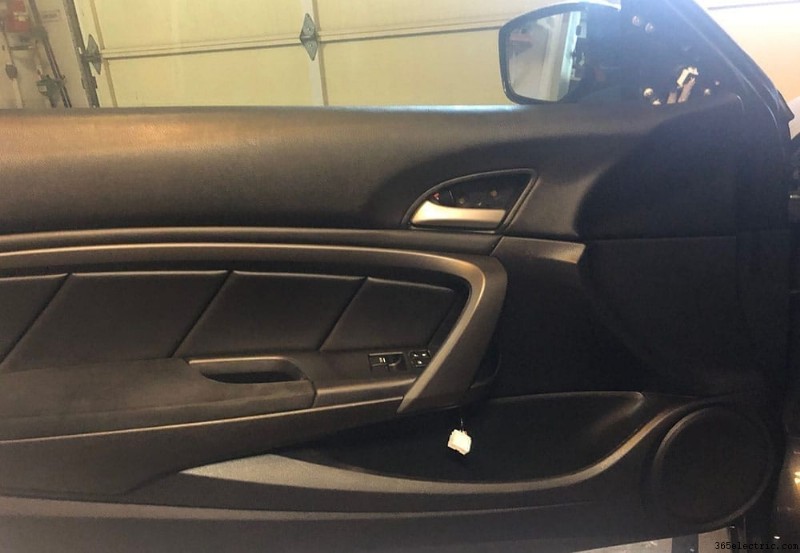
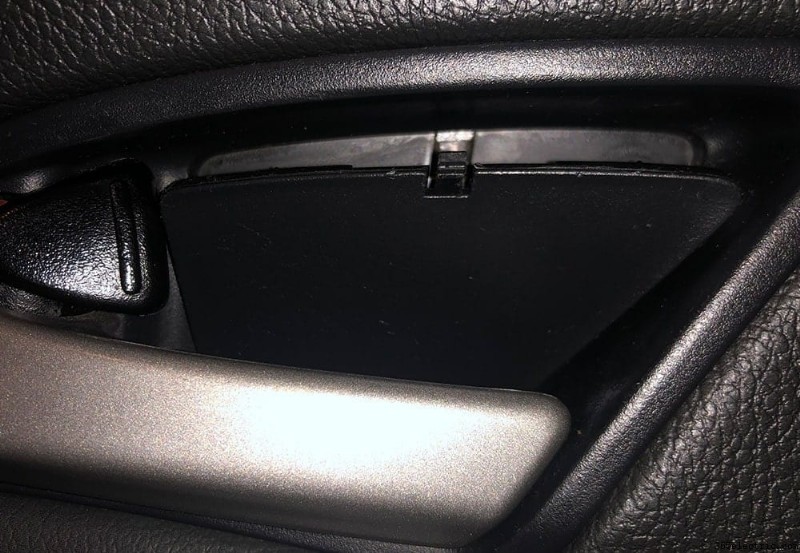
Az utolsó csavar, amelyet el kell távolítania, az ajtókilincs alsó oldalán található panel mögött található. Egy ékszerszám segítségével feszítse le a panelt, hogy eltávolítsa, és hozzáférjen a mögötte lévő csavarhoz. Csavarja ki az utolsó csavart, és tegye félre. Ezután pattintsa le a fehér és szürke dugót az ajtópanelről, és nyomja be őket a panel mögé az ajtóba. Ez lehetővé teszi az ajtó szabad mozgását, amikor lehúzza a panelt az ajtóról.
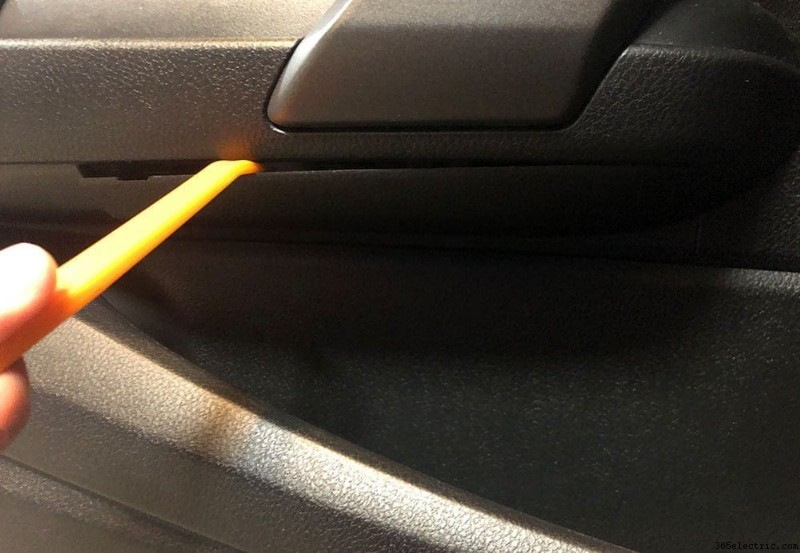

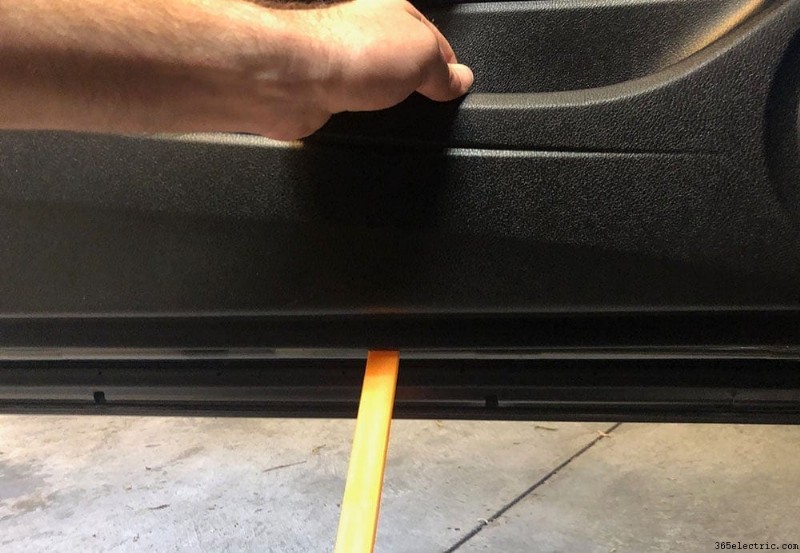
Az összes csavar, magassugárzó és kapcsolódugó eltávolításával készen áll a panel kifeszítésére és az ajtóból való eltávolítására. Ehhez ékeljen be egy nagy feszítőeszközt a panel alsó oldalára. Ha nincs elég nagy feszítőeszköze, akkor a panel alsó oldalán van egy hely, amelybe az ujjai beleférnek.
Pulling from the very bottom side of the panel and from the cubby area, pull the door panel outwards away from the door to unclip all of the bottom door clips. Typically this will be a loud and abrupt ‘POP' and the bottom side of the panel will break free. There are clips along side the entire bottom of the panel and one or two on the side.
Once all of the clips are free, lift upwards on your door panel to remove it. Once it's lifted away from the door the last piece you'll need to pull free from the panel is the handle. There's a few plastic clips on the back side of the handle that you'll just need to lift upwards to break the handle free and detach it from the door panel.
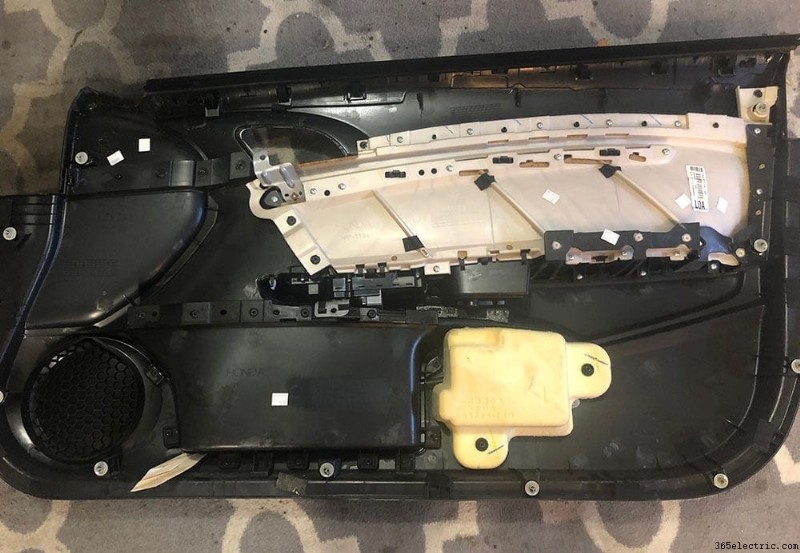
Place it on a rug or towel to prevent any scratching of the surface.
Step 2:Removing Your Broken Door Actuator
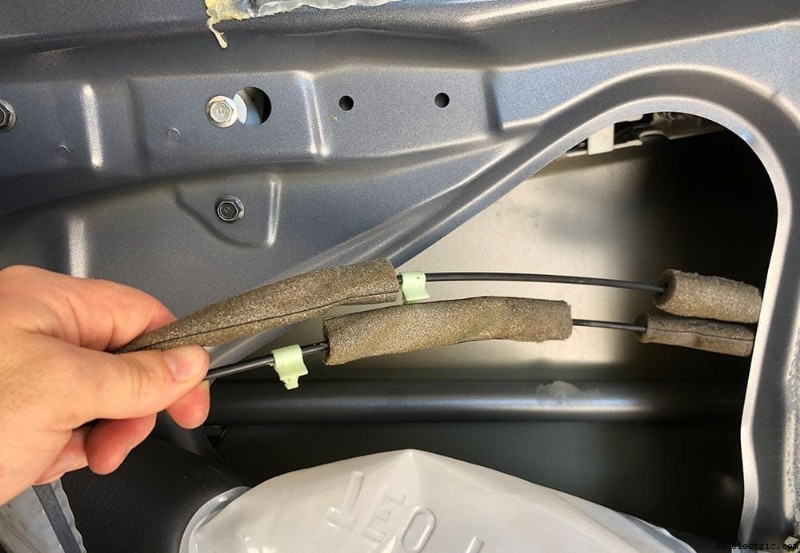
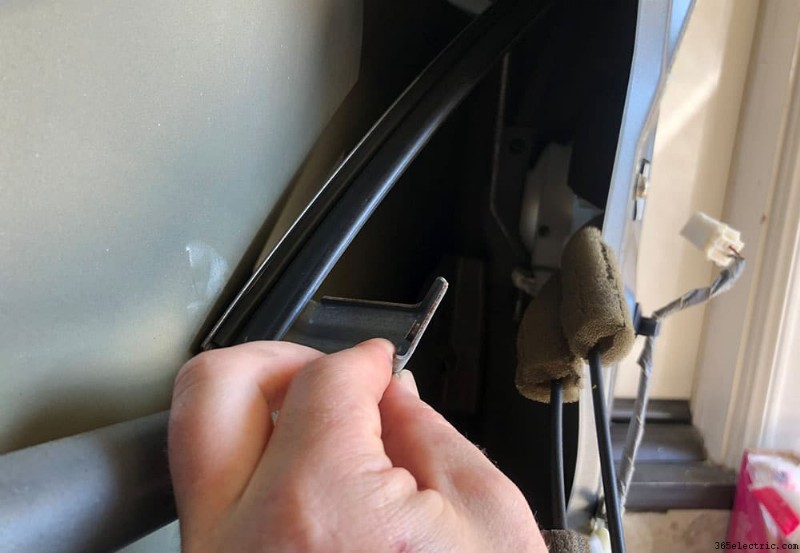
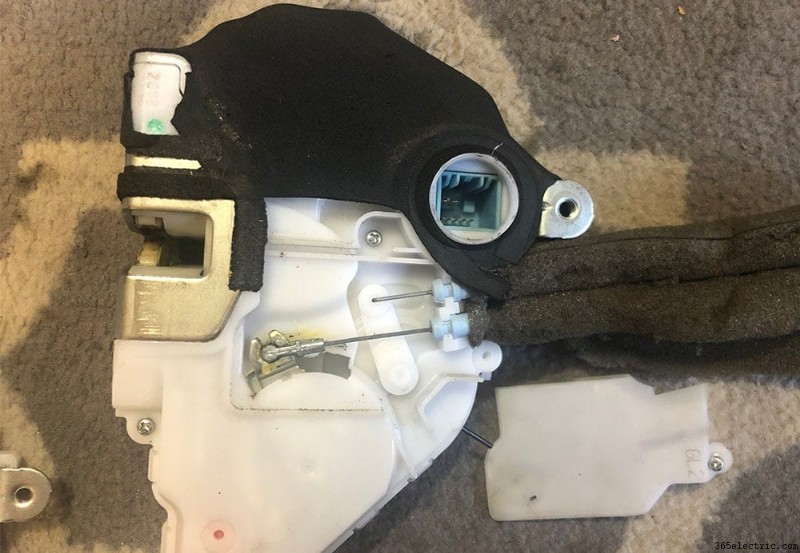
With your door panel removed, you now will be able to gain access to the back side of the door and ultimately the actuator. To begin, you'll need to get behind the damping material that covers the opening of the door panel so that you can reach and access the cable and actuator rod. You can do this by running a razor blade along the adhesive that holds the damping material to the door and peel the material back a foot or two – enough to reach the actuator. In my case I cut a sizable slit in the center to try to limit the damage to the damping.
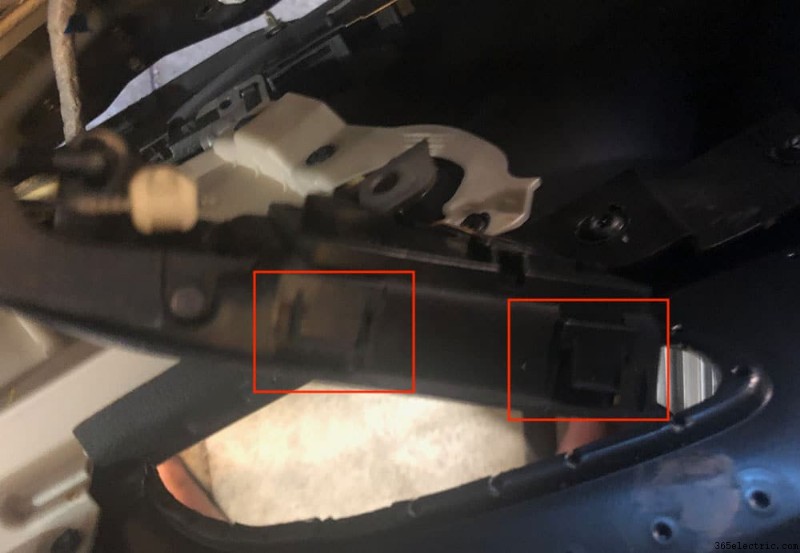
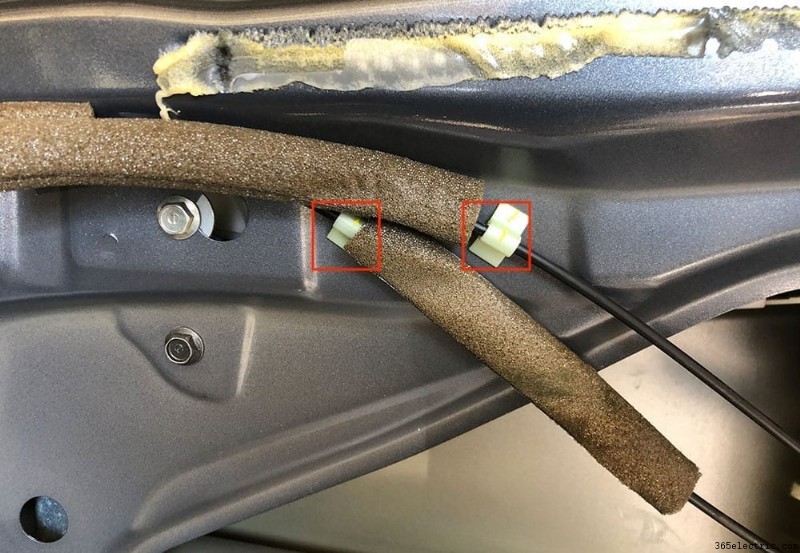
Next, you'll need to unclip the door latch cable that runs along the door and into the back side of the actuator. Once unclipped you can either feed the cables and latch through the damping material or you can leave it hanging for now until you remove the actuator.
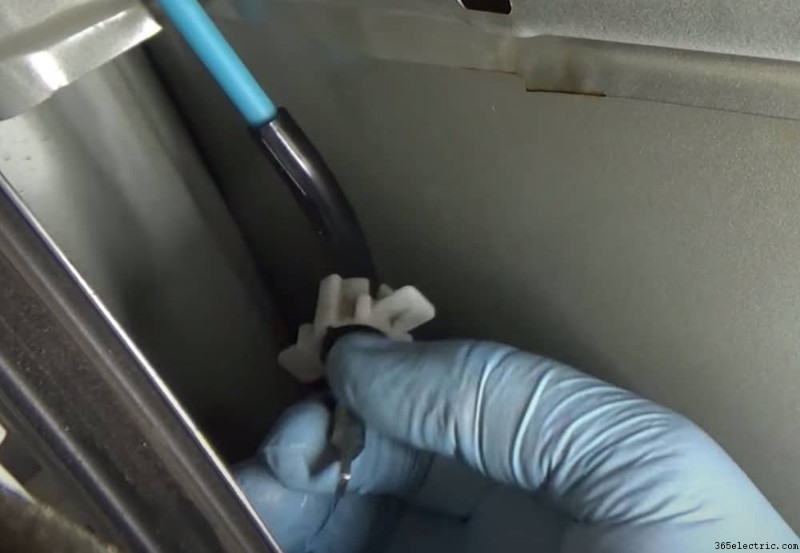
Using the slit in the damping to access the actuator, for those who are replacing the driver side actuator you'll need to remove a single cable that feeds directly into the back side of the actuator (*note this single cable that goes to the back-side of the actuator is only located on the driver side door actuator) . To do this, you need to grasp the white clip that surrounds the black cable housing and pull it away from the actuator to get it to unclip. Once it's unclipped you can remove the cable from the actuator itself (see images). Finally, pull out the plug that powers the actuator.
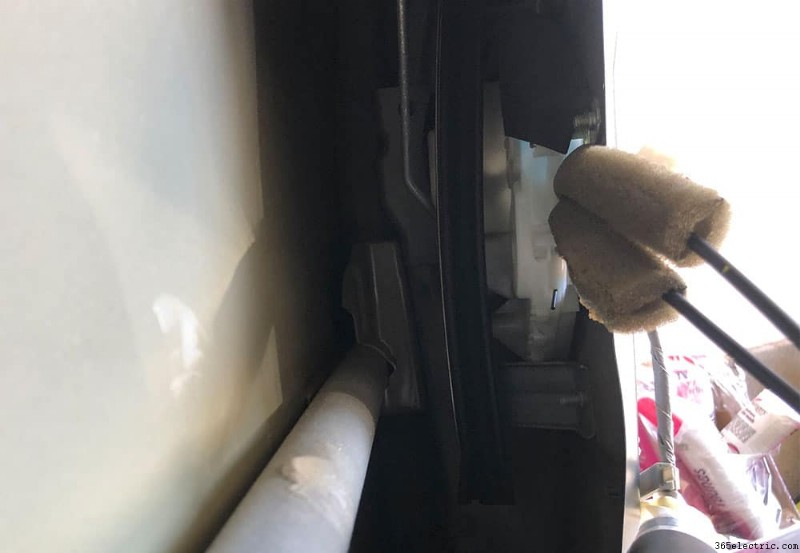
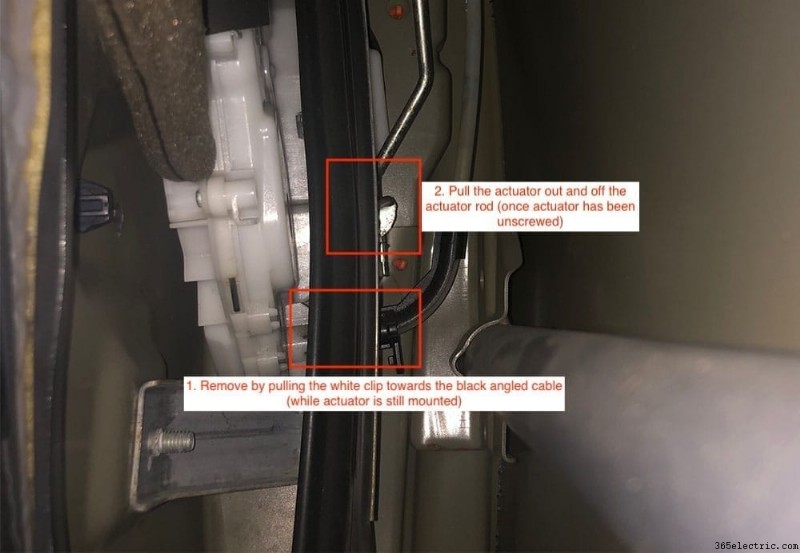
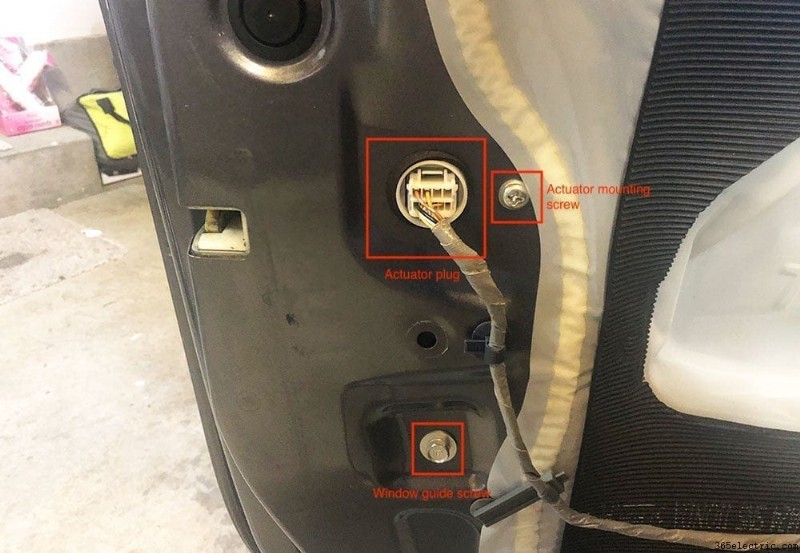
With the cables unhooked from the door and the single cable removed from the back side of the actuator you're ready to unmount the actuator from the door. There are a total of 4 phillips screws that hold the actuator to the door. Remove all 4 screws along with the 10mm bolt that holds the window guide behind the door. This will allow you to pull the actuator from behind the door a little easier with the window guide pushed aside.
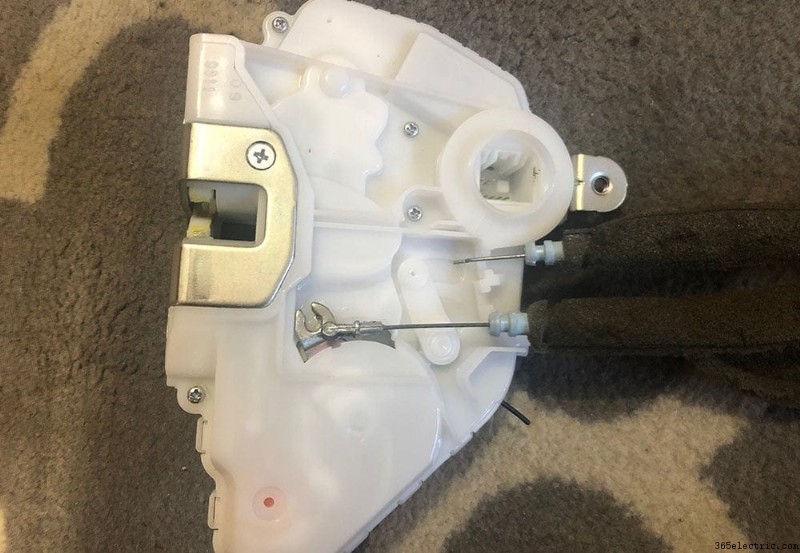
Start to pull the actuator from the door, working the remaining rod out. Once the rod is removed you can pull actuator out completely and begin the process of preparing your new actuator.

Step 3:Prepping Your New Door Actuator
There's a couple things you'll need to do to prepare your new door actuator for installation. First, the door handle cables that run to the interior door handle will need to be pulled from the old actuator and installed on the new one. There's a panel that covers the cables with a single phillips screw holding the cover in place. Unscrew the panel to gain access to the two cables.
Remove the two cables from the old actuator and then place it onto the new one along with the cable cover, screwing it back into place.
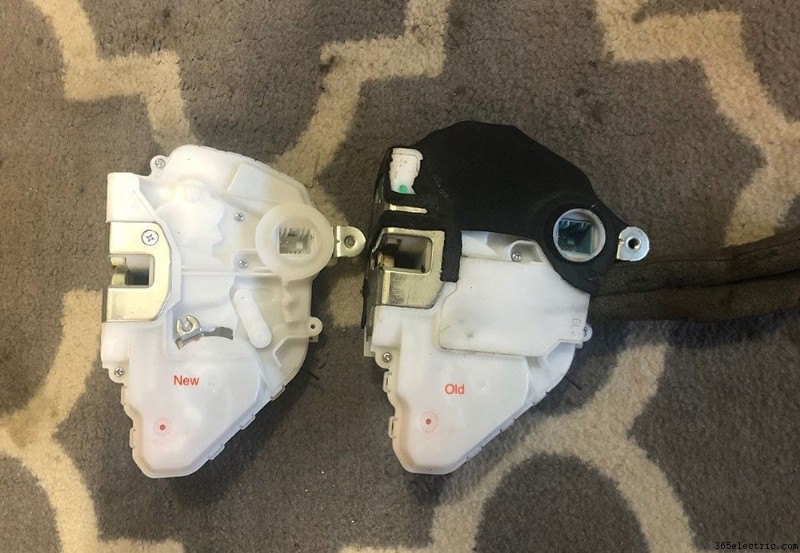
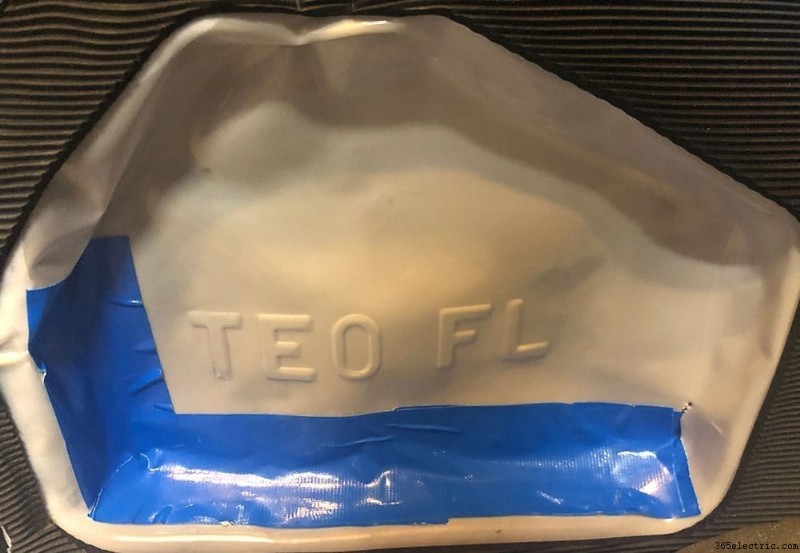
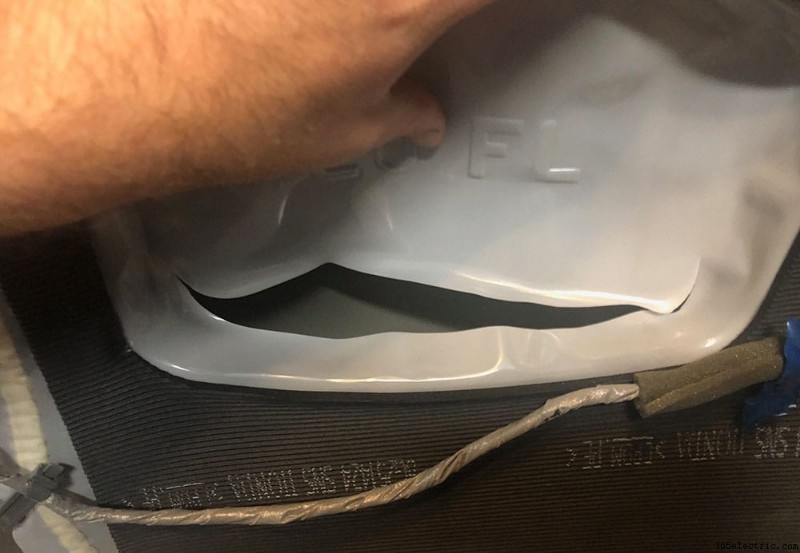
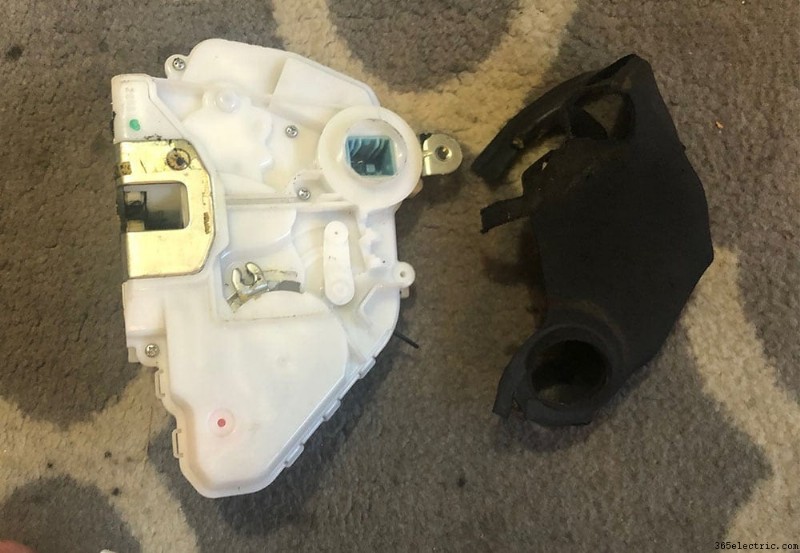
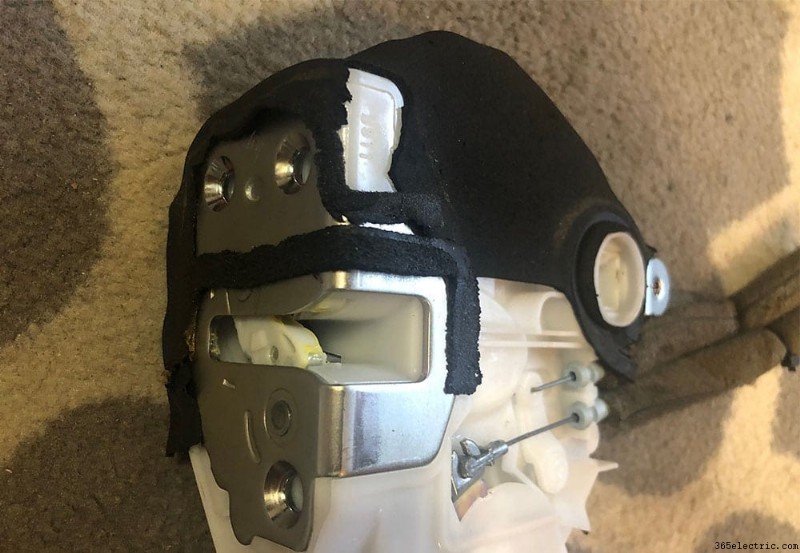
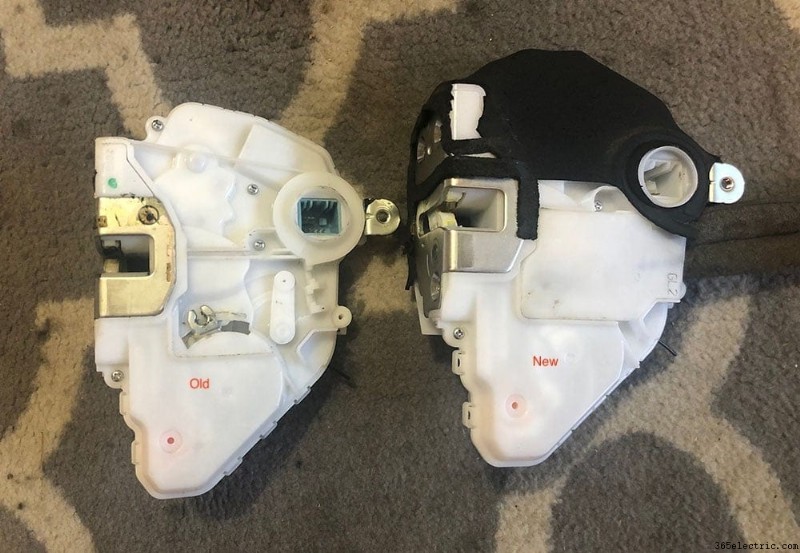
Once the cables are in place on the new actuator, the only thing left to do is to remove the old padding that's on the old actuator and place it onto the new one. Unfortunately, the new actuator doesn't come with the padding so it'll need to be reused from the old, broken unit.
I used a razor blade to separate the padding from the actuator with minimal damage and then used a few dabs of super glue to fuse it to the new one. For the most part, the padding is placed between the door and the actuator so naturally when it's mounted it'll stay in place.
Step 4:Re-installing Your Actuator and Door Panel
The rest of the process is pretty simple. Re-install your actuator, feeding the actuator rod back into the actuator and then mounting it to the door. Plug the actuator plug back in, then insert and re-clip the single cable back into the backside of the actuator.
After the actuator is mounted and the cables are in place, be sure to re-install your window guide and screw it in, along with clipping back the door handle cables to the door.
At this point, you're ready to test your new actuator. Close your door (note that you should ensure the door is unlocked before you close it), and then use your remove to lock and unlock to ensure your new actuator is working properly.
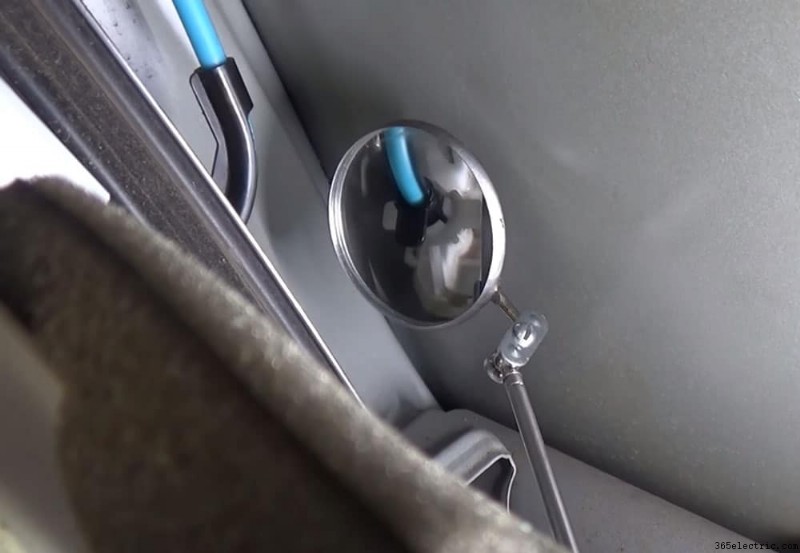
As for the slit that you cut (if you cut one) into the damping, I used some heavy duty duct tape to seal it back up. With the damping fixed you can re-install the door panel, ensuring that the window and door lock buttons are plugged back in. Re-install your tweeter, and you're done!
Hope you enjoyed the how-to, please feel free to leave us a note or ask questions in the comments below!