Hogyan:Az ajtó hangszóróinak cseréje a 09-18 Ram 1500-on
Szükséges idő:3 óra 30 perc
Nehézségi fok:Könnyű
A Ram 4. generációs 1500-as sztereója megfelelő volt abban az időben. Ahol a 3. generációban egy pár 6x9s volt elöl és 6,5"-os koaxiális hátul, a 4. generációhoz 6 hangszórórendszer került. Ez a 6 hangszórórendszer két pár 6 × 9 hüvelykes hangszóróból áll az első és hátsó ajtókban, valamint egy pár 3 1/2 hüvelykes hangszóróból a műszerfalban.
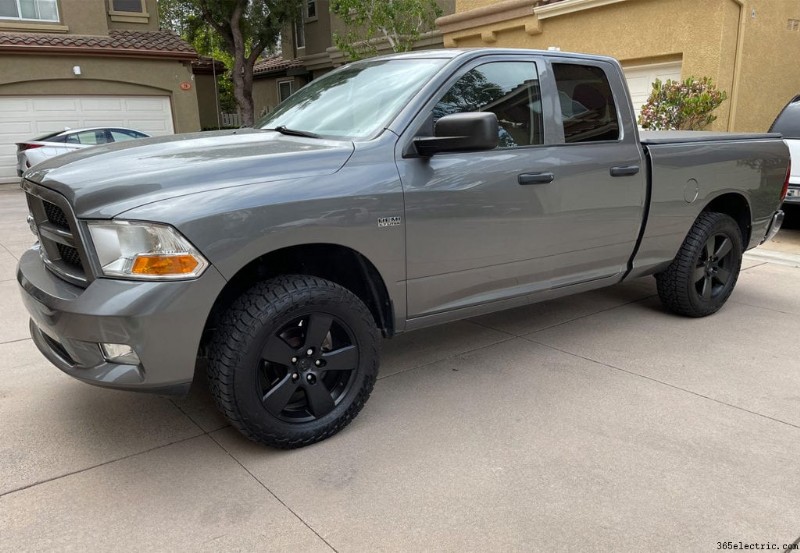
A mai cikkben egy 2012-es 4. generációs Ram 1500 Express Quad Cab első és hátsó ajtó hangszóróit fejlesztem. Már frissítettem a sztereót, és az ülés alá egy meghajtott mélynyomót szereltem, ami kiváló jelöltté tette egy jó hangszórópárnak. A frissítéshez a Sony új Mobile ES hangszórócsaládját fogom használni. Íme egy pillantás a teherautóra.
Akár kiégett a hangszóró, akár csak komoly frissítést szeretne a nagyobb hangerő és tisztaság érdekében, a telepítési folyamat ugyanaz. A cikk végére mindennel rendelkeznie kell ahhoz, hogy tudjon továbbfejlesztett vagy csere hangszórókat a Ram ajtópanelébe.
Szükséges alkatrészek és szerszámok
Eszközök:
- Philips és laposfejű csavarhúzó
- T-20 Torx bit vagy csavarhúzó
- 5 mm-es foglalat és kilincsmű
- Műanyag panelfeszítő eszköz
- Műanyag klipszfeszítő eszköz
- Gipszkarton kés
- Forrasztóvas és forrasztás (ellenőrizze a 3. lépést, hogy szüksége van-e rá)
Alkatrészek:
- 6 × 9 hüvelykes hangszóró (2 pár, ha elöl és hátul csinálod)
- Metra 72-6514 (opcionális a 3. lépéstől függően)
- Hangszóró vezeték (ellenőrizze a 3. lépést, hogy szüksége van-e rá)
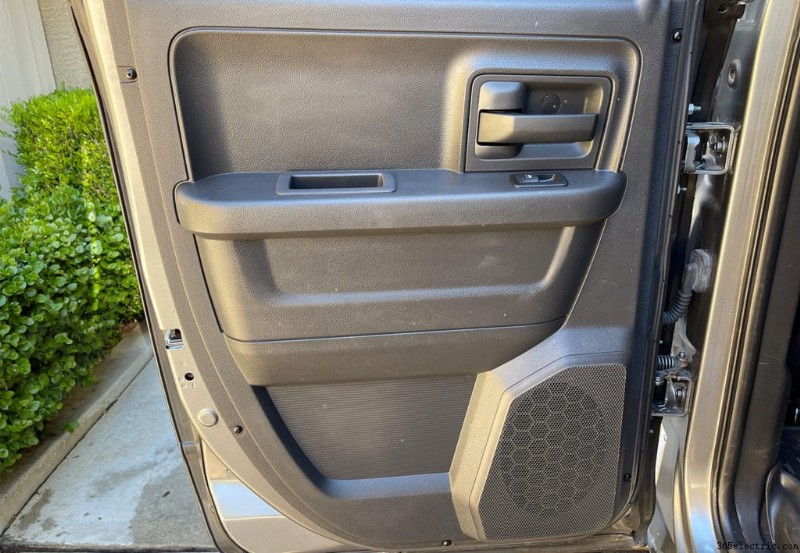
Az első ajtó hangszóróinak cseréje
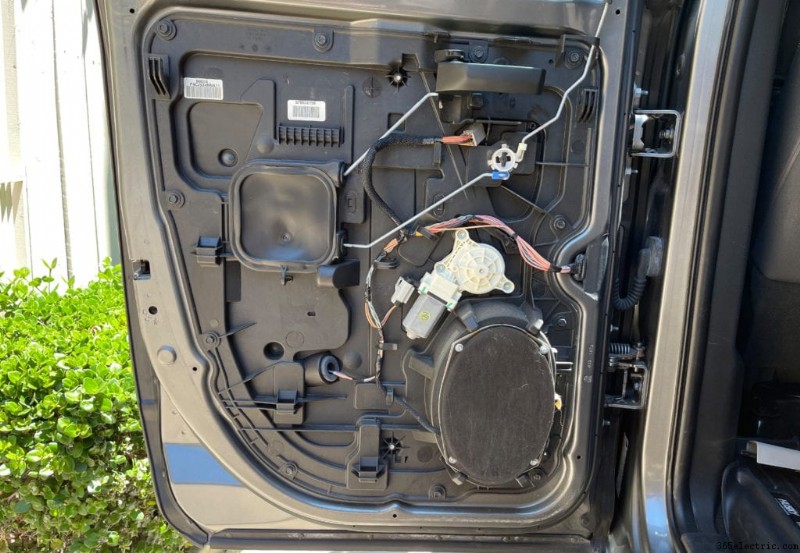
Az első helyen, ahol elkezdtem ezen a teherautón, az első ajtó hangszóróival kezdtem. A hangszórók eléréséhez először el kell távolítania az ajtópanelt. Ez elég egyenes és gyors.
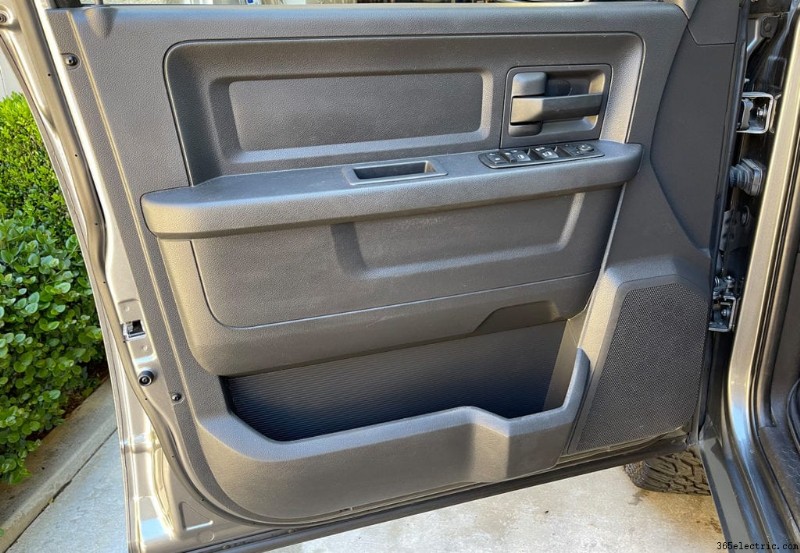
1. lépés:Távolítsa el az ajtópanelt
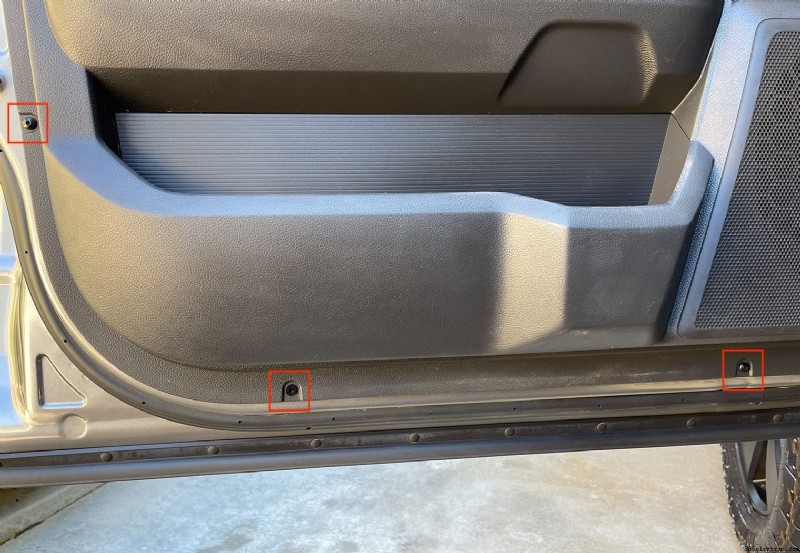
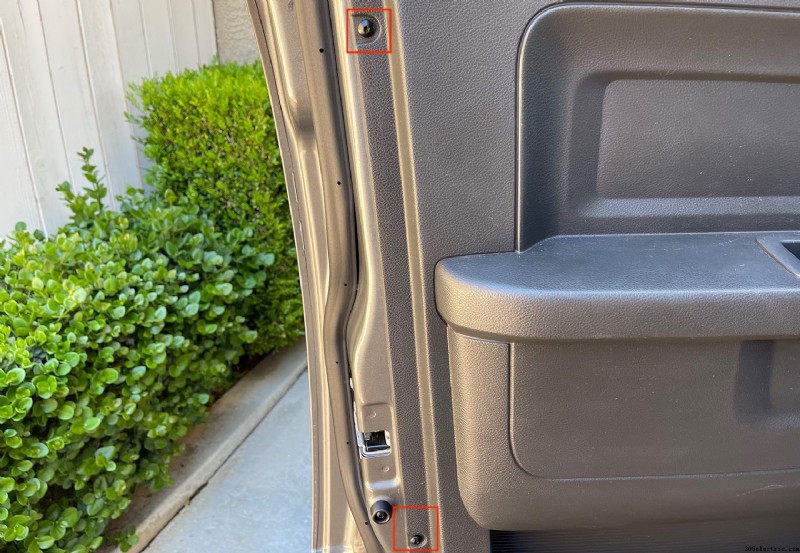
Az elülső ajtópanelek összesen 6 csavarkapcsot tartalmaznak, amelyek kicsavarásához és kihúzásához egy T-20 torx bitre lesz szüksége. Kettő van a bal oldalon, kettő alul és kettő a jobb oldalon. Távolítsa el ezeket a klipeket, és helyezze biztonságos helyre.
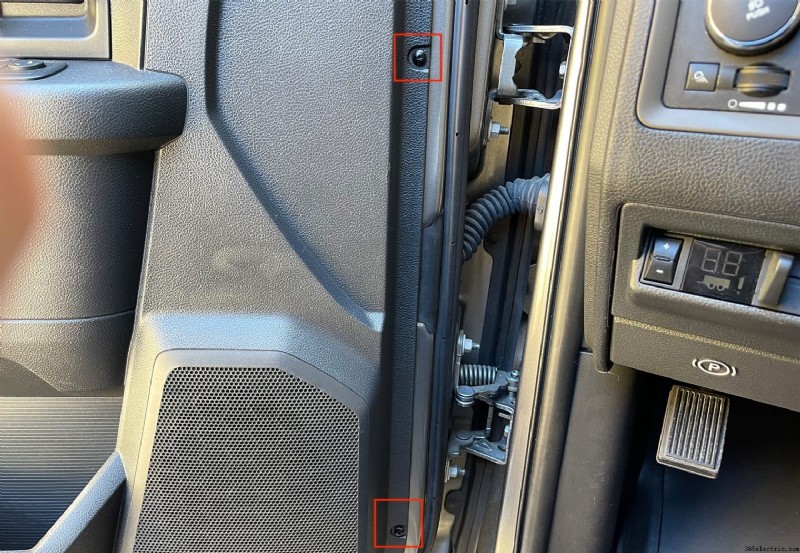

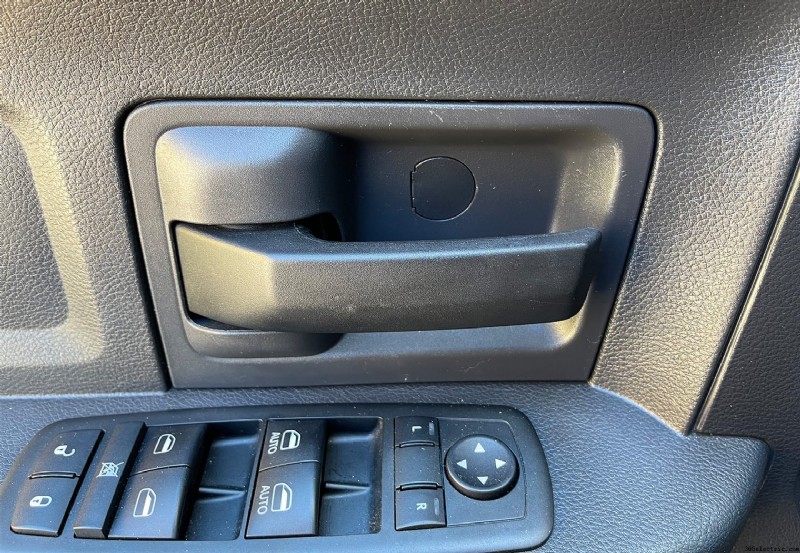
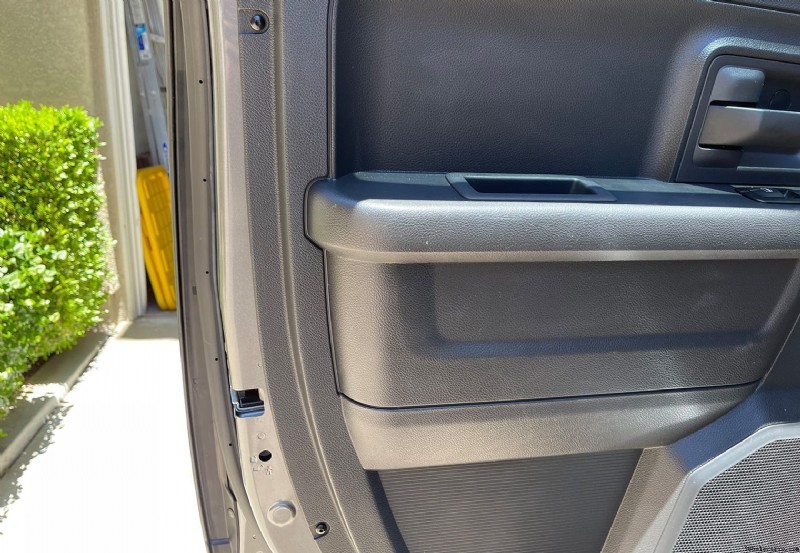
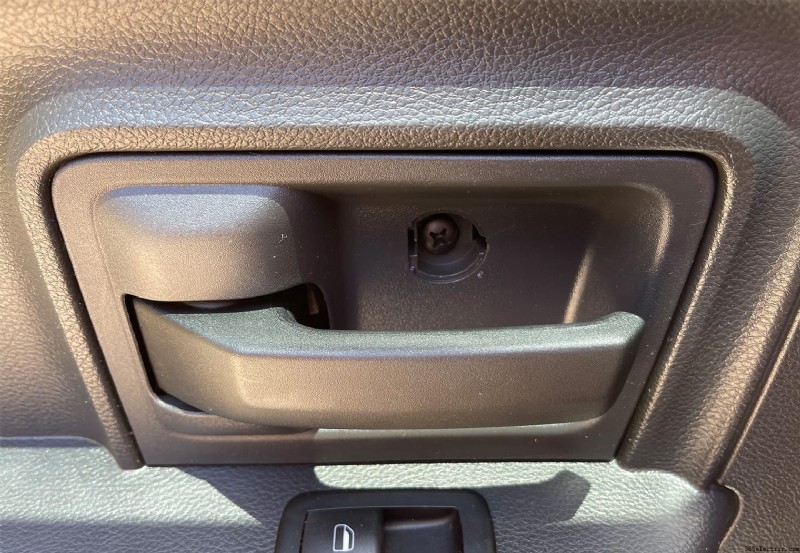
Ezután el kell távolítania a fogantyú mögött található egyetlen keresztirányú csavart. Egy kis laposfej segítségével távolítsa el a közvetlenül a fogantyú mögött található csavarfedelet, és egy nagy, hegyes csavarhúzóval távolítsa el a csavart. Miután eltávolította a csavart, húzza le a fogantyút körülvevő kis panelt.

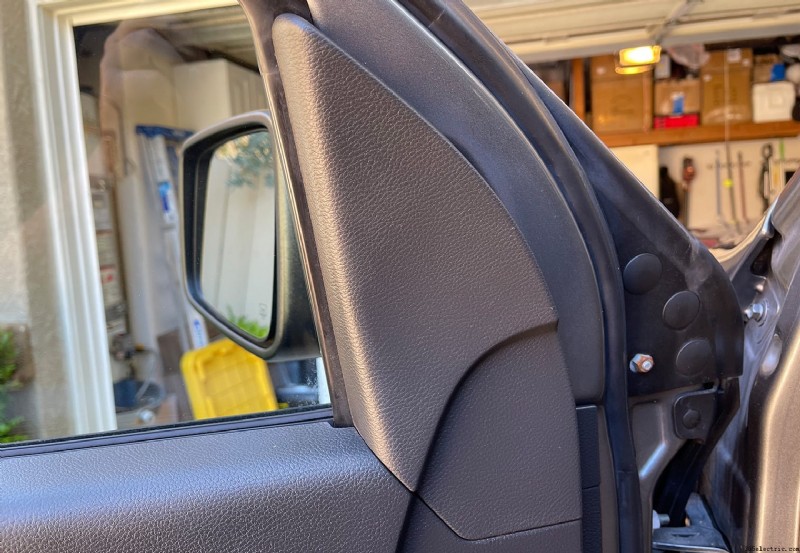
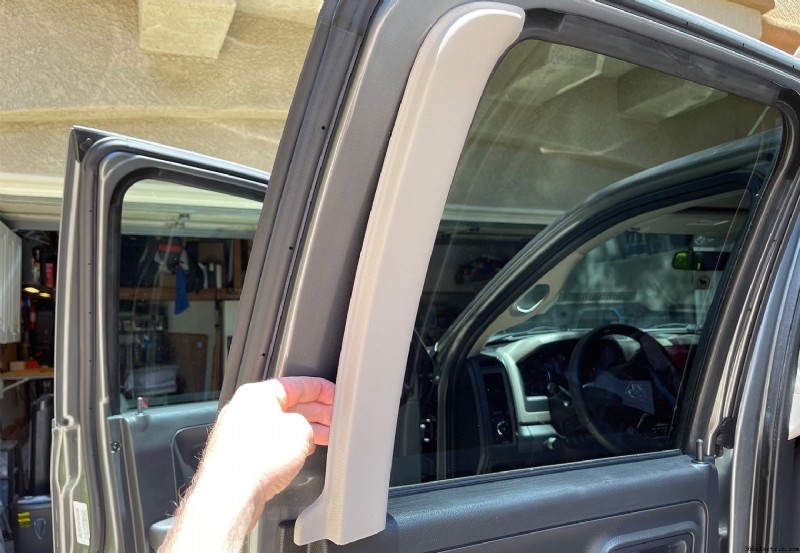
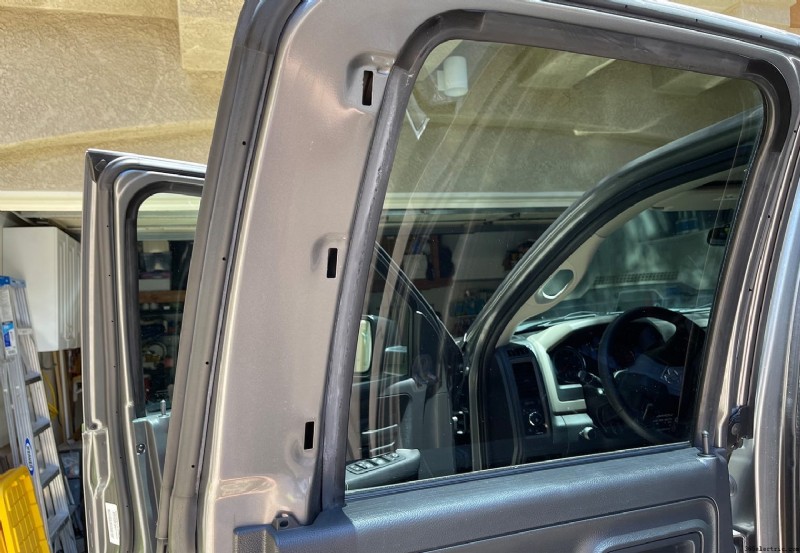
Miután az összes csavart eltávolította a panelről, le kell pattintania az ajtó felső, belső részén található díszítőelemet. Ehhez húzza kifelé a panel felső részét, és az egész panel könnyen eltávolítható.
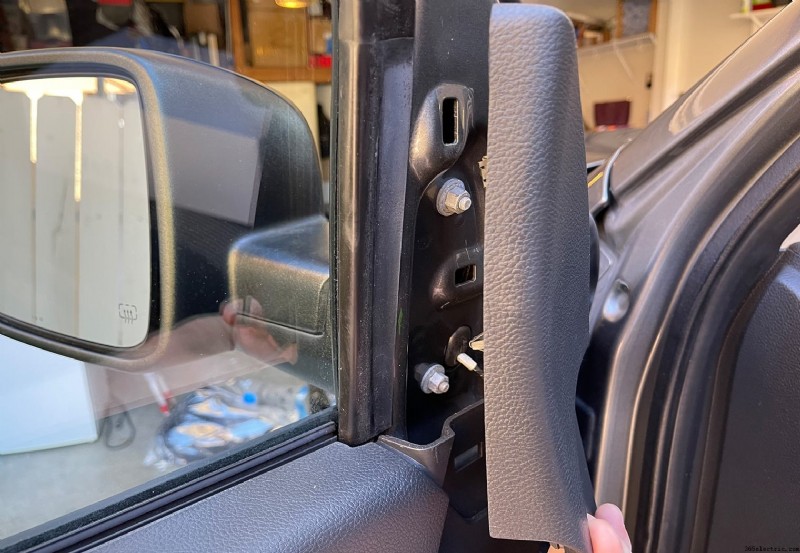
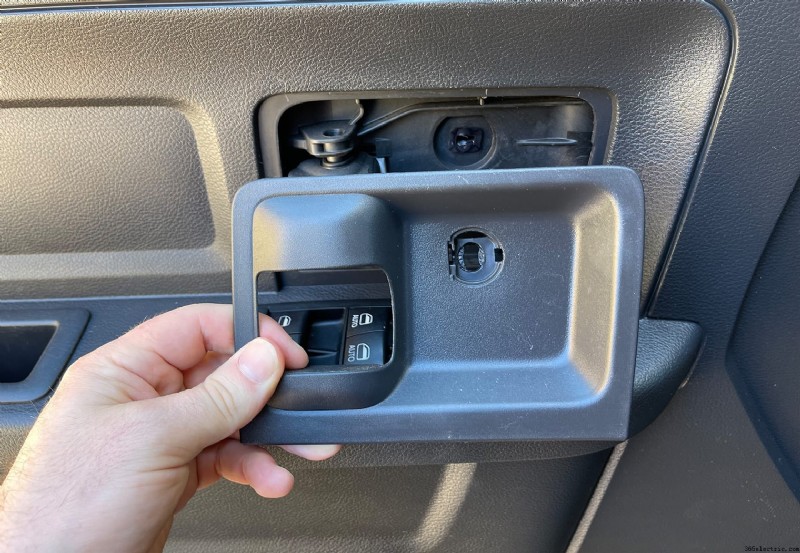
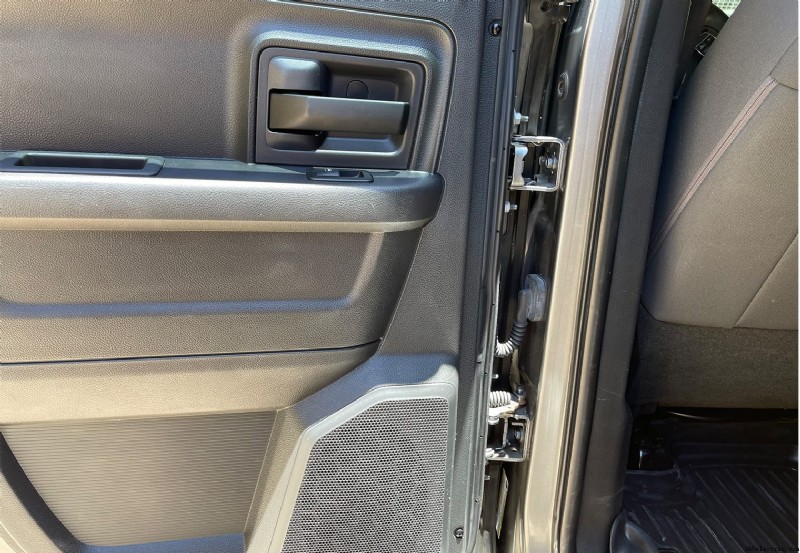
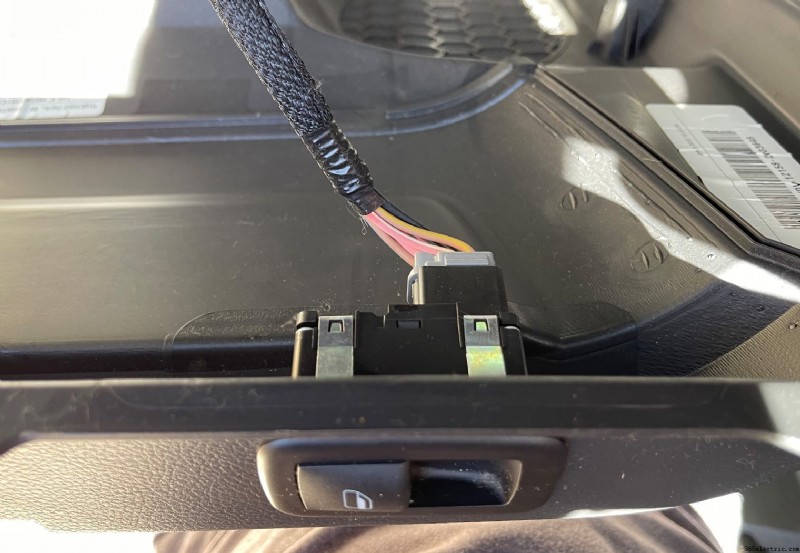
Most megkezdheti az ajtópanel eltávolítását ennél a lépésnél, vagy eltávolíthatja az ablak/zár vezérlőpanelt, és először húzza ki a konnektorból. Először eltávolítottam az ajtópanelt, majd lecsatoltam a vezérlőpanelt az ajtóról, de ez a te döntésed.
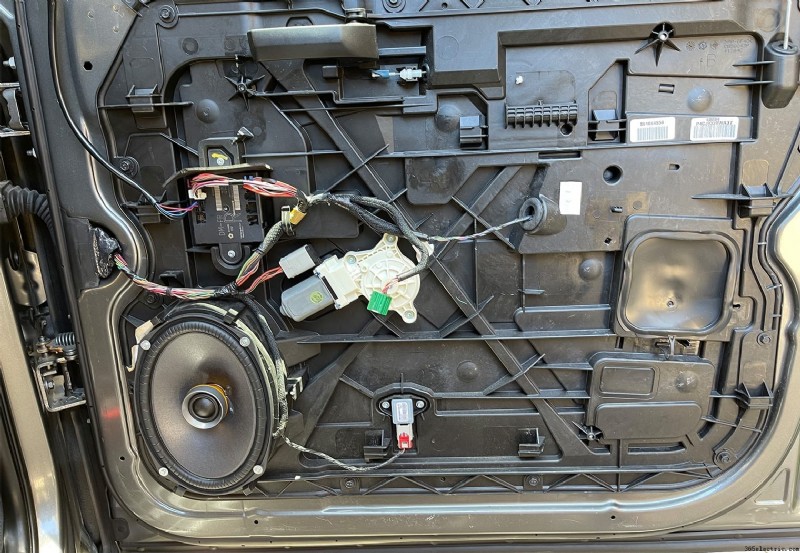
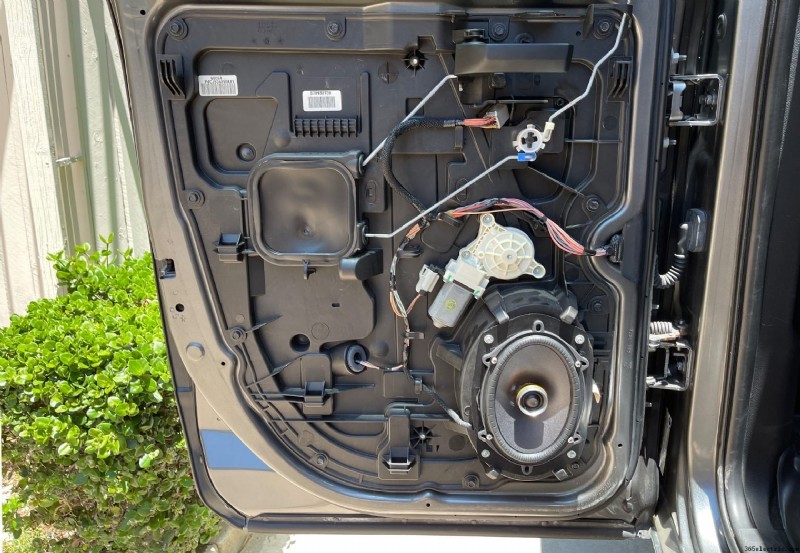
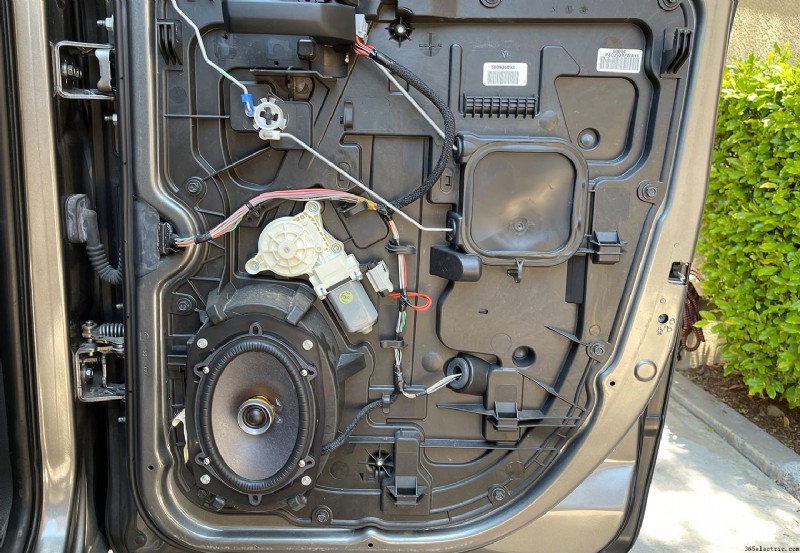
Az ajtópanel eltávolításához ezen a ponton csak emelje felfelé a panelt, majd kifelé. Utána ismét lecsatoltam a vezérlőpultot, így az alábbi képek ezt mutatják. De használhatja a feszítőeszközt is az ablak vezérlőpaneljének lecsatolására, kihúzására, majd az ajtópanel eltávolítására.
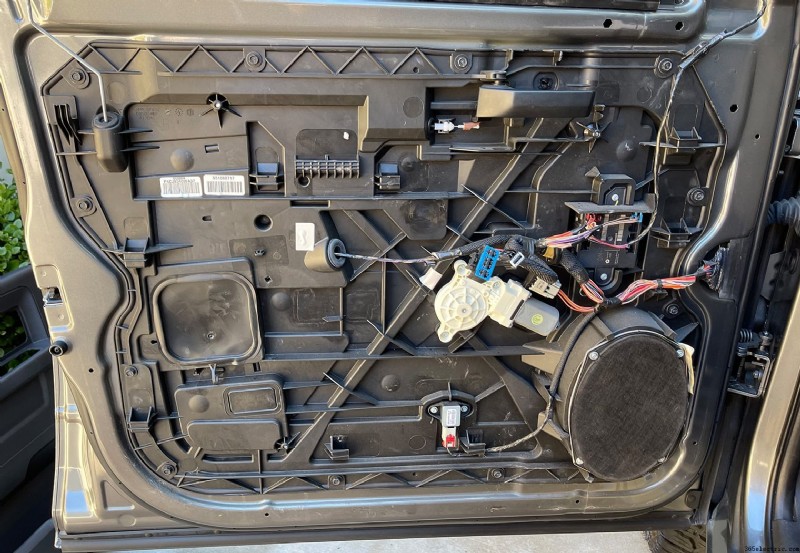
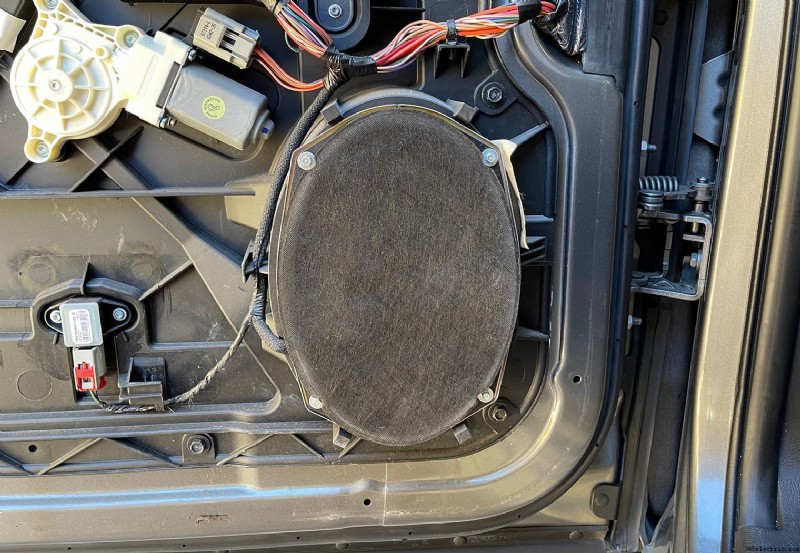
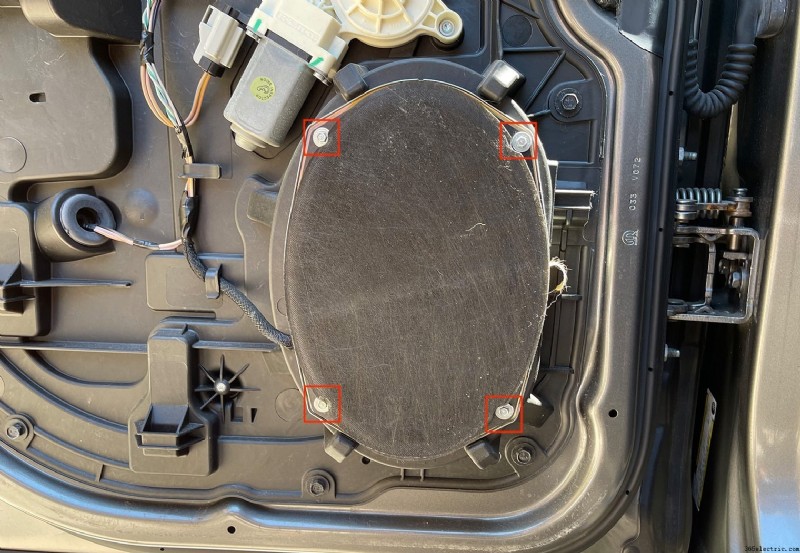
2. lépés:Távolítsa el a hangszórót
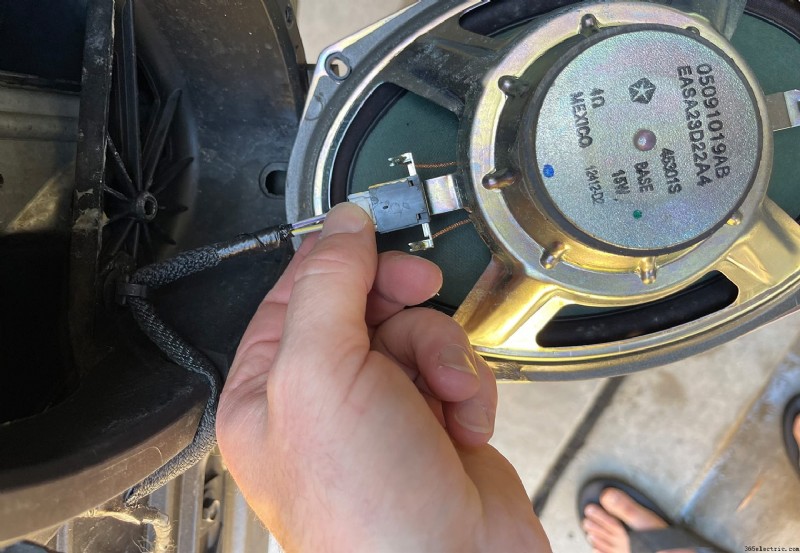
Ez a folyamat legegyszerűbb része. Az ajtó hangszóróját 4 csavar tartja a helyén. 5 mm-es aljzatot használtam a csavarok eltávolításához (bár valószínűleg szabványos méretű). Távolítsa el a csavarokat, akkor a hangszóró könnyen kijön. Húzza ki a hangszórót, és vegye ki teljesen a járműből.
3. lépés:Új hangszórók előkészítése
Ez a lépés nem kötelező, és többféleképpen is elvégezhető. Én személy szerint mindig szeretem újra felhasználni a meglévő hangszórókapcsokat, hogy adaptert készítsek az új hangszórókhoz. Ha 15 dollárt is szeretne megtakarítani, ez egy jó módja annak. Alternatív megoldás a Metra 77-6514 (hangszórópáronként egy készlet) vásárlása. Ha a Metra adaptereket választja, akkor nem lesz szüksége hangszóró vezetékre, forrasztópákra vagy az Alkatrészek és szerszámok részben felsorolt forraszanyagra, és ugorhat a 4. lépésre.
Akárhogyan is építi a sajátját, mint én, akár megvásárolja őket, az adapterek lehetővé teszik az új hangszórók csatlakoztatását és lejátszását. Nem kell aggódnia amiatt, hogy a hangszórót a helyére kell forrasztania az ajtón, vagy más módon bekötheti az új hangszórót, mivel az ajtón korlátozott hely áll rendelkezésre.
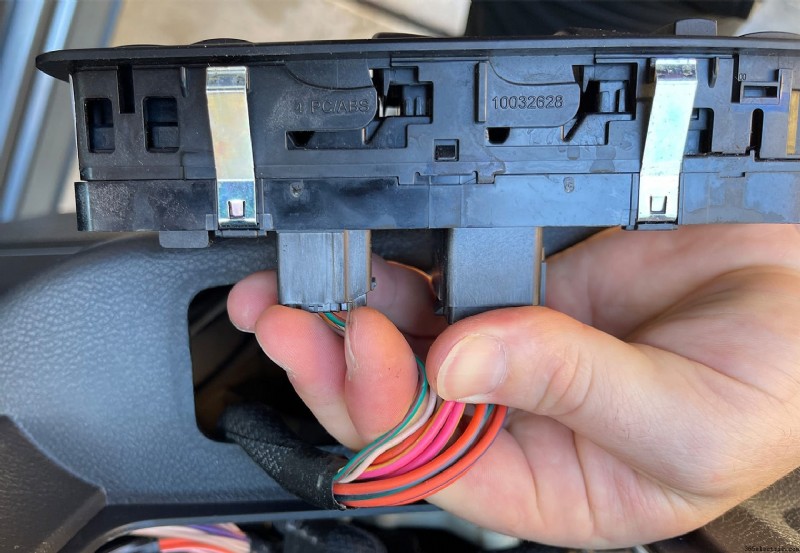
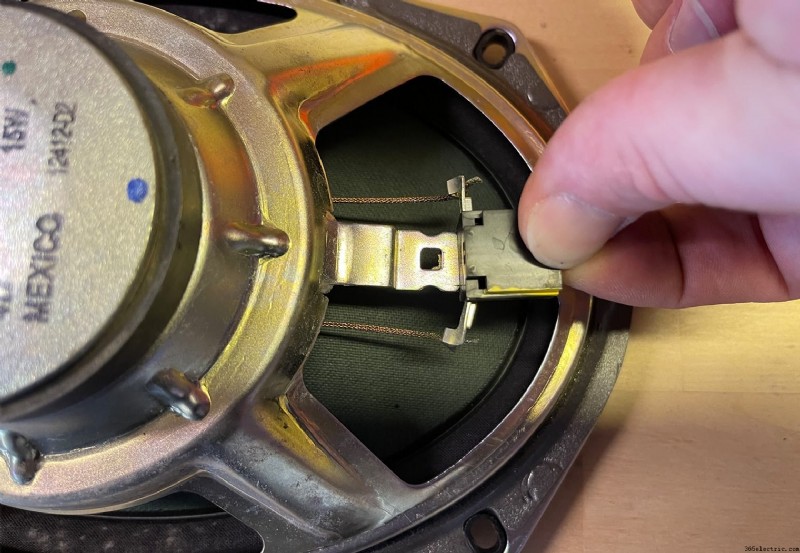
Az adapterek létrehozásához először el kell vágnia a vezetékeket a hangszórón lévő csatlakozó hátulján (nem az ajtóban!), majd laposfejű csavarhúzóval le kell pattintania a csatlakozót a keretről. a hangszóróról.
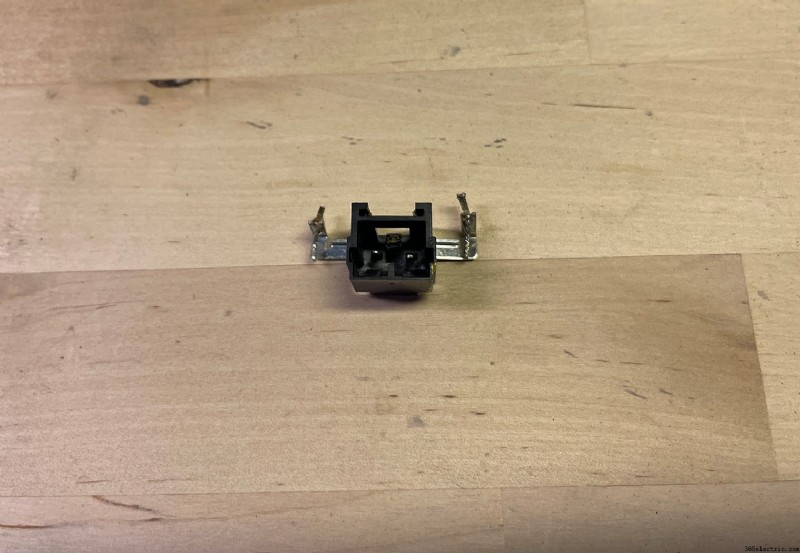
Ha kihúzta a dugót, most meg kell találnia, hogy a csatlakozó melyik oldala pozitív és melyik negatív, hogy tudja, hogyan kell csatlakoztatni az új hangszóróhoz. Ehhez vigye vissza az eltávolított dugót az ajtópanelhez, és dugja be. Ezután a következő vezetékszínek segítségével határozza meg, hogy a csatlakozó melyik oldala pozitív és melyik negatív:
- Első bal hangszóró vezeték (+):szürke/lila
- Bal első hangszóró vezeték (-):szürke/sárga
- Jobb első hangszóró vezeték (+):sötétzöld/lila
- Jobb első hangszóró vezeték (-):sötétzöld/sárga
Jelölje meg a pozitív oldalt, hogy megfelelően csatlakoztathassa az új hangszóróhoz. Az én esetemben a dugó valójában már a pozitív oldalon volt megjelölve egy sárga jelölőn keresztül. A tied lehet, de lehet, hogy nem. Ha a dugó meg van jelölve, megkezdheti az előkészítést és az új hangszóró csatlakoztatását.
Ehhez forrasztópáka segítségével távolítsa el a régi hangszóró vezetéket, és bádogozza be a dugót egy új forraszanyaggal. Ezután egy 2-3 hüvelykes vezetékkel forrassza a pozitív és negatív vezetékeket a dugóhoz.
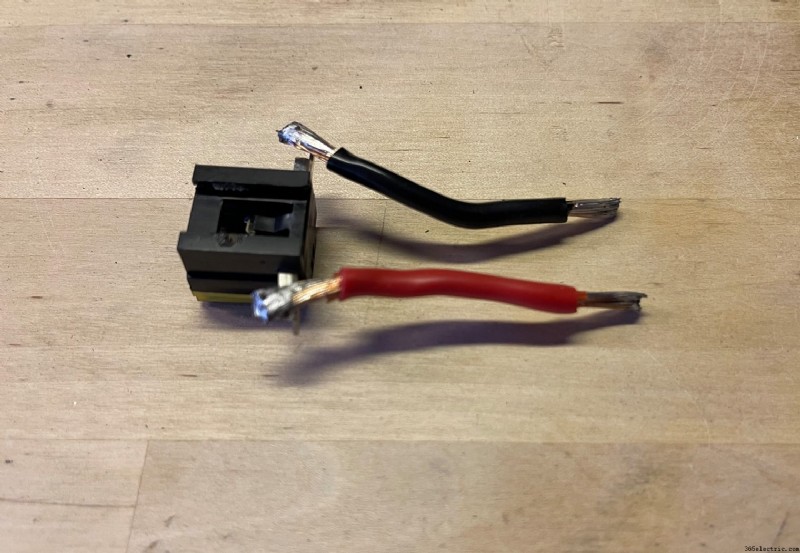
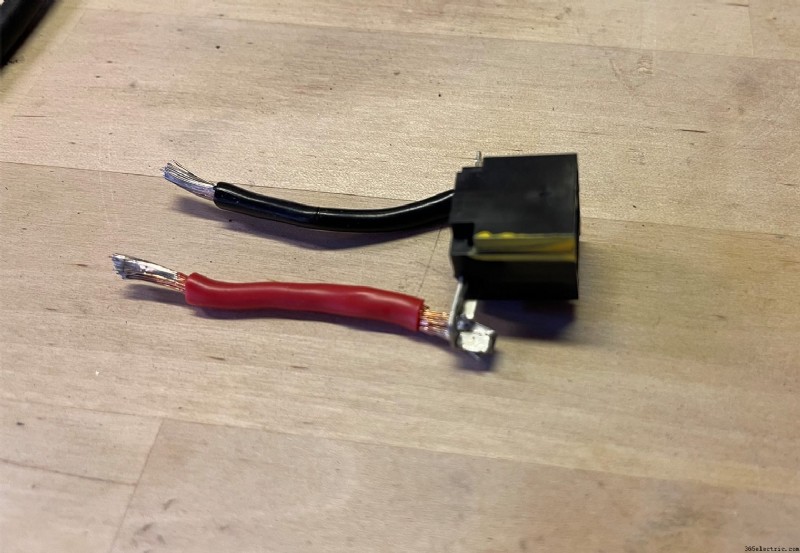
Miután előkészítette a hangszóródugót, csatlakoztassa a hangszóró csatlakozóihoz. Ezt úgy tettem, hogy közvetlenül az általam használt Sony hangszóró csatlakozókábeleire forrasztottam.
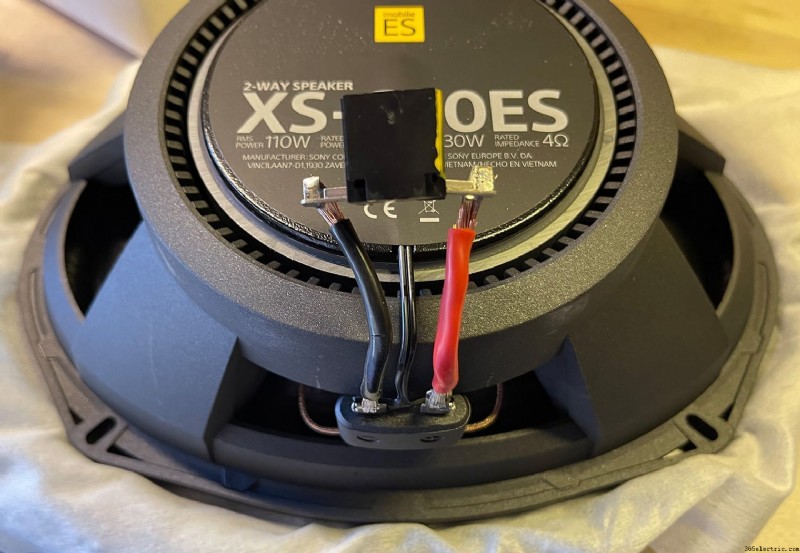
Ezt valószínűleg az összes telepített hangszóróval egyszerre meg kell tennie, hogy a legtöbbet hozza ki az idejéből.
4. lépés:Telepítse az új hangszórókat
Ha a hangszórók elő vannak készítve, a telepítés olyan egyszerű, mint a legtöbb hangszóró eltávolítása. Egyszerűen bedugja az új hangszórót, majd visszacsavarja.
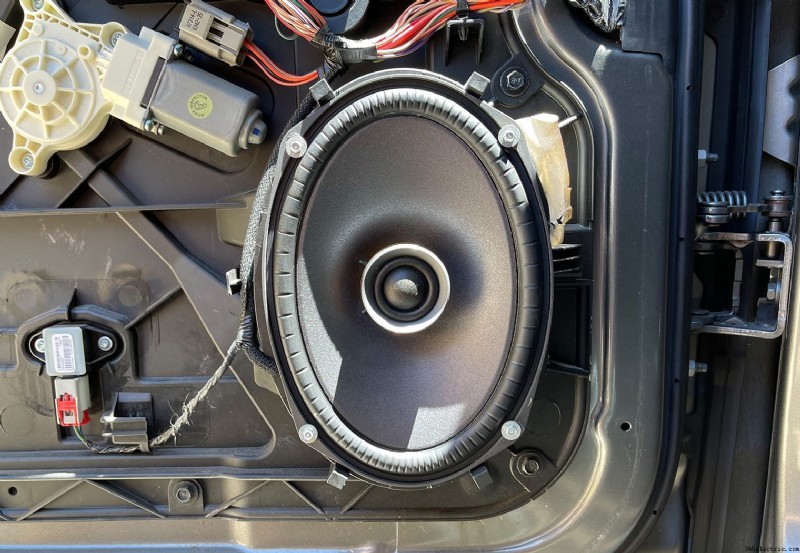
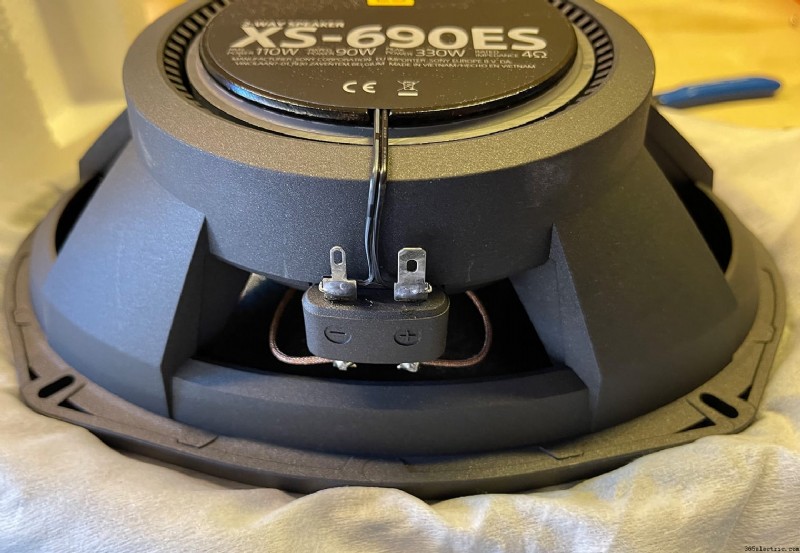
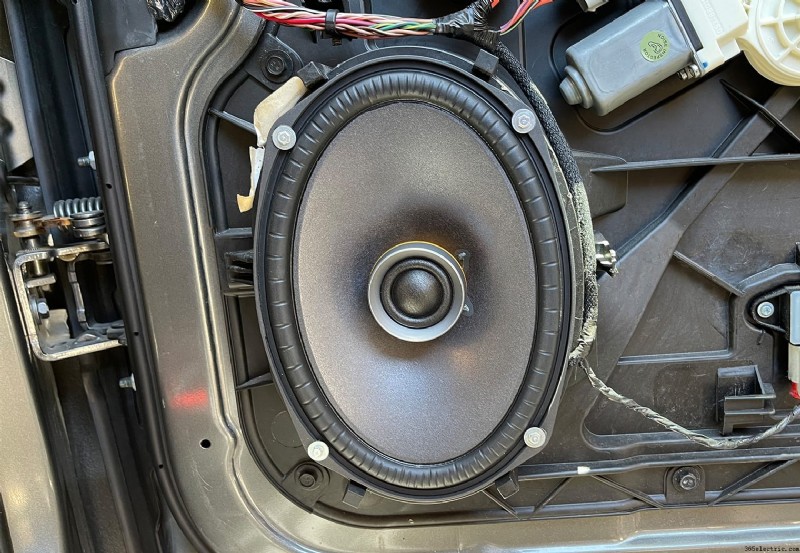
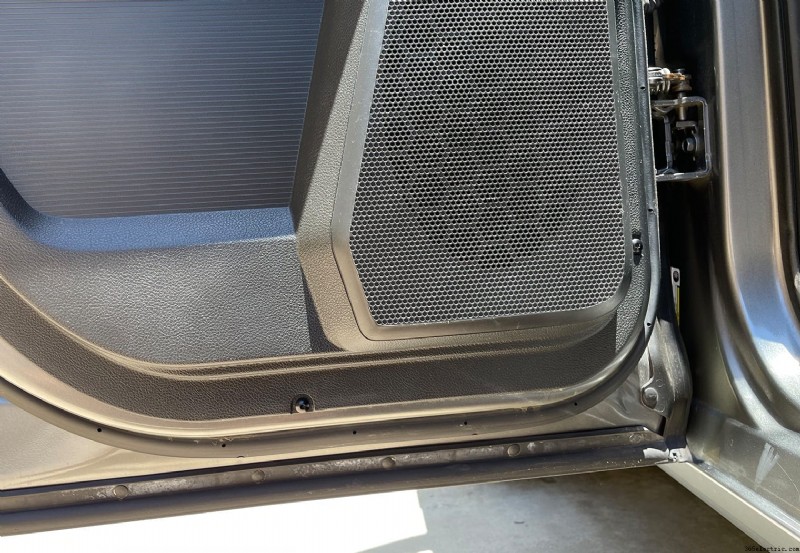
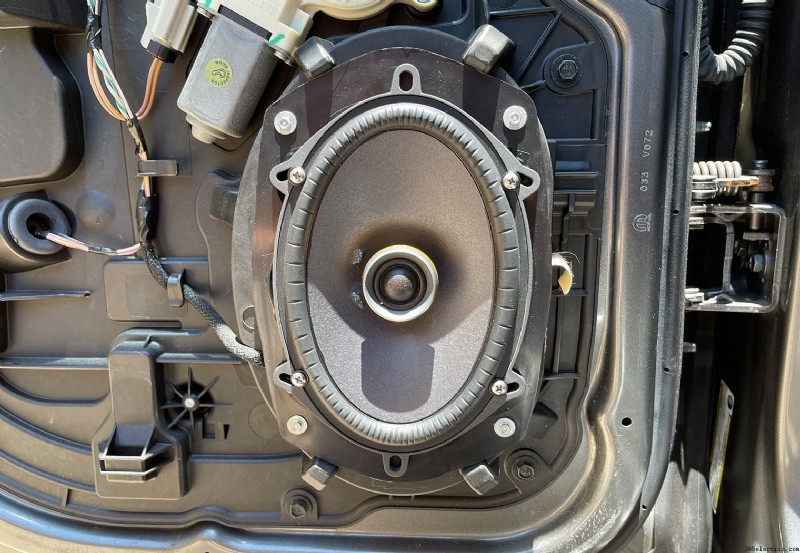
Ha azonban úgy dönt, hogy az általam telepített Sony XS-690ES 6x9s készüléket telepíti, akkor módosítania kell az ajtópanel rögzítését, hogy illeszkedjen az ötsugaras ház köré. Ez nem jellemző, azonban ezek a hangszórók nem olyanok, mint minden hangszóró, és nagyobb a keretük, mint a legtöbbé.
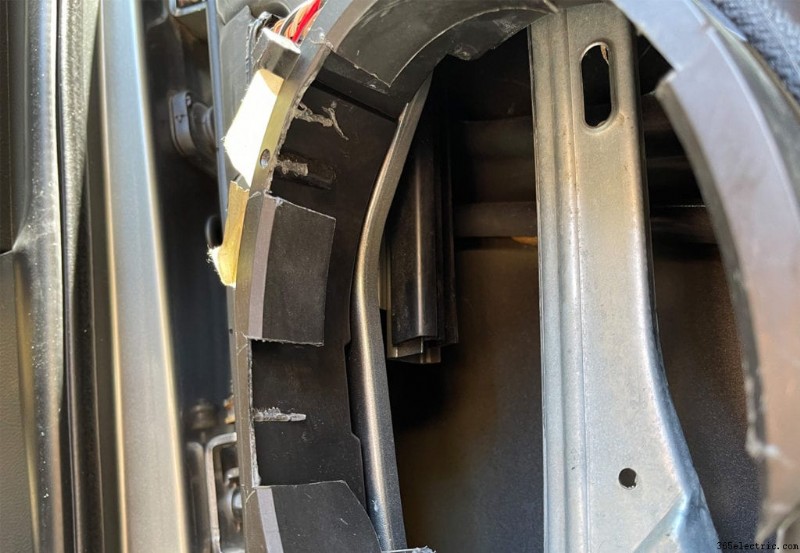
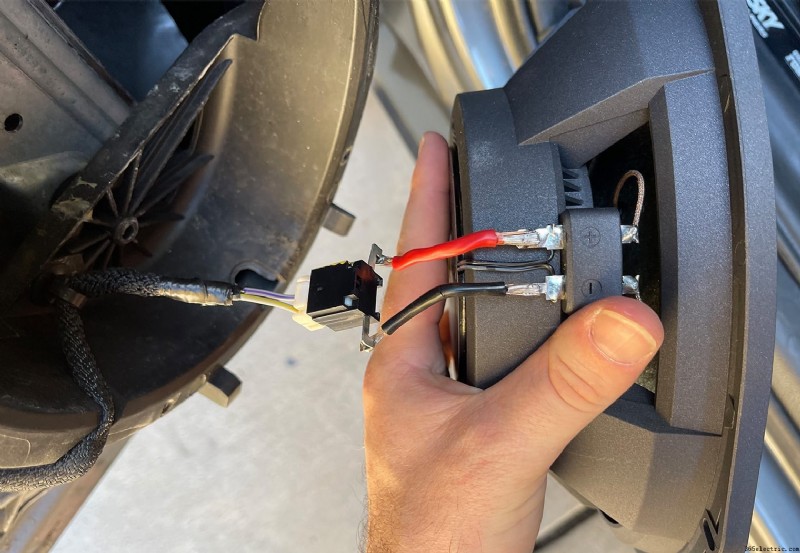
If you don't want to go through this process, you can take a look at some speaker alternatives listed on our best 6×9 speaker buying guide. Most speakers will not have a deep and wide frame like these Sonys and should just slide right in. The end product should look something like this!

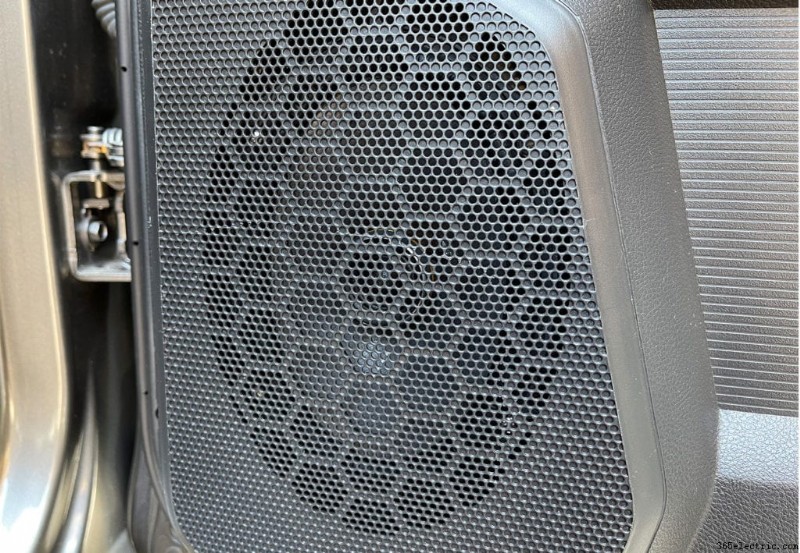
Step 5:Re-Install Door Panel
With your speakers installed, turn on your stereo first to test out the sound of your speakers and ensure that everything is working as expected. If everything sounds good, re-install the door panels in the reverse order as described in step 1.
How to Replace the Rear Door Speakers
The process for changing out the rear door speakers is nearly identical to the fronts that I walked through above. The only difference is really the door panel but the process is the exact same. I'll go through the rear doors here with a little more brevity than I did the fronts.
Step 1:Remove the Door Panel
On the rear doors of this quad cab there were 5 torx screw clips (vs the 6 in the front door panel). Remove these 5 clips using a T-20 torx bit and a clip puller or prying tool.
With these clips removed, locate and remove the phillips screw that's behind the door handle. Remove the cover first to expose the screw using a small flathead then remove the screw. With the screw removed, you'll then remove the trim piece that surrounds the handle.

Next, remove and unplug the window control. You can do this either now or after you lift the door panel off the door. It's up to you.
Finally, remove the trim piece that's above the panel on the outer edge of the door by simply pulling on it. It will unclip and remove relatively easily. Set it aside in a safe spot.
At this point, you can remove the door panel. Do this by simply lifting upwards and outwards on the door panel and it should lift right off. There should not be any additional clips or screws holding the panel to the door. This will expose the speaker and underlying door components.
Step 2:Remove the Speaker
Like the front door speakers, the rear door speakers are 6x9s and held into place by four screws. I used a 5mm socket to remove the screws. Once the screws are removed you can begin to remove the speaker from the door panel and unplug it from the harness.
Step 3:Prepping New Speakers
Please follow the steps in Step 3 of the Front Door Speakers. The only difference will be the wiring colors you'll use to match the positive and negative side of your OEM plug to your new speaker terminals (if you choose to wire them yourself). If you are using Metra's 77-6514, then you can simply connect the adapters to the speaker terminals on your new speakers and proceed to step 4.
For reference, the speaker colors on the rear doors are as follows:
- Rear Left Speaker Wire (+):Gray/Dark Green
- Rear Left Speaker Wire (-):Gray/Light Green
- Rear Right Speaker Wire (+):Dark Green/Gray
- Rear Right Speaker Wire (-):Dark Green/Light Green
Step 4:Install the New Speakers
With your new speakers prepped with their plug, you can now simply plug them into the OEM harness and screw the new speakers back in. In the images below, I actually used Sony's 6×8 speakers instead of 6x9s using a speaker adapter plate to mount them. If your installing 6x9s you'll simply screw them directly into the OEM mounting position.
If you decide to install the Sony XS-690ES 6x9s in the rear, just like I mentioned while installing them in the front door panels above, you'll have to alter the OEM mounting in order to fit the five-beam structure into the OEM mounting position by cutting out slots for the beams. This won't be necessary for most other 6×9 inch speakers.
And if, for some reason, you want to use a 6×8 you'll need cut out the adapter plate and mount the 6×8 speaker to the plate. Then, you can install the speaker in the 6×9 location. My recommendation would be to just purchase a 6×9 if you haven't already. But, if you have 6x8s handy like I did, here's what the added step looks like.
First, cut out the adapter plate to fit the 6×8 speaker. Then use the rear mounting plate that your speaker came with to mount the speaker to the plate. These adapter plates will adapt a 6×9 to a 6×8, 5×7 or a 6.5″ speaker so you need to cut it out to fit a 6×8 specifically.
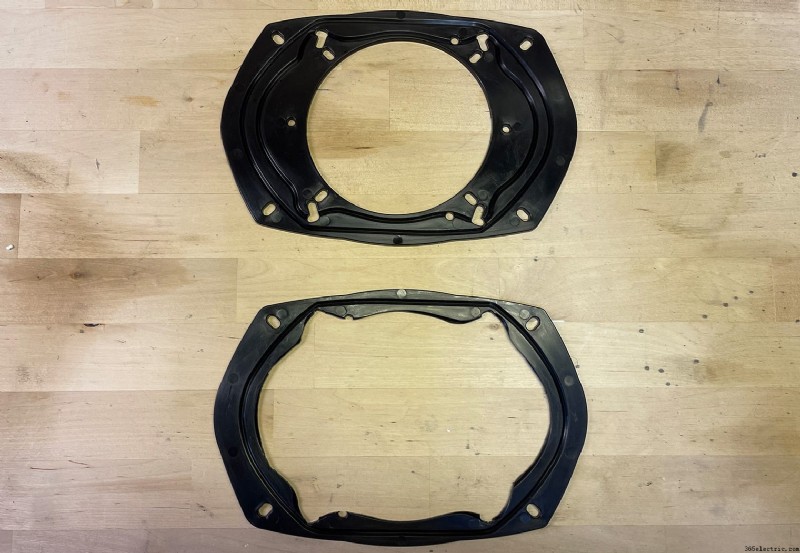
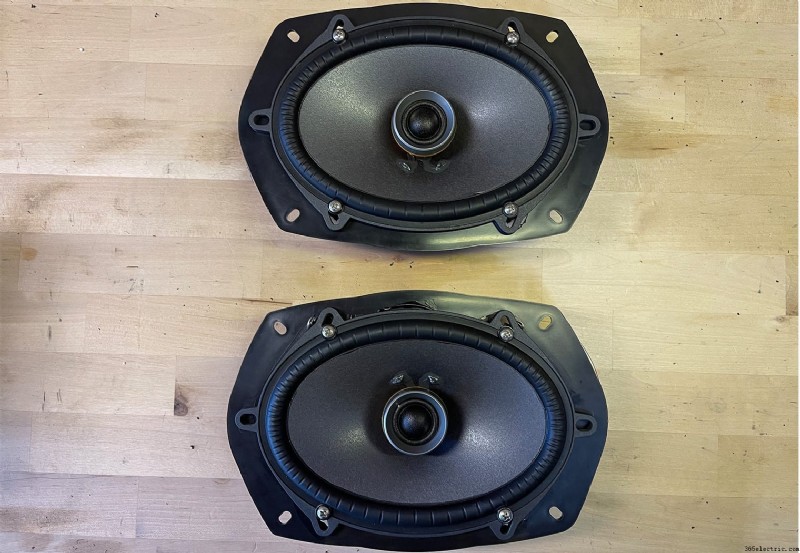
Once that step is completed, you can just mount the 6×8 and its adapter straight to the 6×9 opening. Again, if you're installing a 6×9 in the rear you can disregard the adapter plates and this added step. Here's the end result.
Step 5:Re-Install Door Panel
With your speakers installed in the rear door panels, turn on your stereo first to test out the sound of your speakers and ensure that everything is working as expected. If everything sounds good, re-install the door panels in the reverse order as described in step 1.
Conclusion
Overall, this installation was pretty straight forward and easy to do. The hardest part was fitting these high performance Sony speakers into the OEM mounting location since the frame of the speakers is wider than the OEM 6×9 speakers. An alternative to cutting out the OEM mounts like I did would be to try a set of 6×9 inch mounting spacers. I didn't try this but it's pretty common and might resolve the frame width problems a bit. Without this modification, it would have cut out an hour or so of my time. The installation, in general, is a perfect DIY for a Saturday and should be doable for even a novice.
After the speakers were installed, wow what a difference. Significantly cleaner, louder, fuller sound than the OEM speakers. I was really surprised with the volume and sound quality with just the head unit power from Sony's XAV-AX8100 too. This wasn't an amplified system and I don't think I really want to amplify it after hearing it. Combined with Sony's XS-AW8 that I previously installed under the driver seat, this is a really great setup that's ideal for a DIYer!