A 30 legjobb őszi fotózási tipp:alapvető fotózási tanácsok
Az őszi szín jóslásától az ICM-mel való kísérletezésig, a csontvázak feltárásáig és az arany kereséséig Tracy Calder 30 tippet ad a kiemelkedő őszi fotózáshoz
A 30 legjobb őszi fotózási tipp
1. Találd meg a rendet a káosz
banAmikor erdei tájat fényképezel, nehéz lehet vizuálisan értelmezni az Önt körülvevő káoszból. A jelenet leegyszerűsítése érdekében keressen olyan facsoportokat, amelyek szépen el vannak különítve, mind a keretben, mind elölről hátrafelé. Ahol lehetséges, ne olyan szögből fényképezzen, amely lehetővé teszi a törzsek átfedését, és válasszon egy „hősfát”, amely köré a kompozíció többi része csukódik. Hasznos lehet az ismétlődő formák, vonalak és minták keresése is.
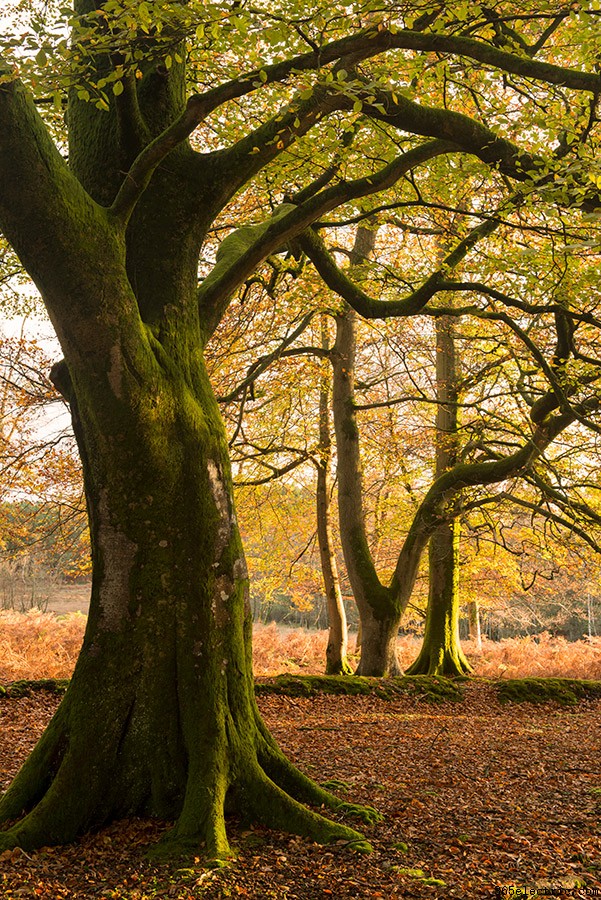
Kép:Ross Hoddinott
2. Ne légy félénk
Egyes fafajok „koronafélénkségnek” nevezett viselkedést mutatnak, ahol a csúcsok nem érintkeznek teljesen, így fotogén rések keletkeznek a lombkoronában – ez gyakran előfordul ugyanannak a fafajnak a fáinál, és megfigyelték a fekete mangrove, a japán vörösfenyő és egyes fajok esetében. eukaliptusz. Ha olyan szerencsés, hogy szemtanúja lehet ennek a jelenségnek, üljön a hátára, fordítsa kameráját az ég felé, és kezdje el dolgozni! Ha nem, akkor is készíthet lenyűgöző lombkoronaképeket, ha lefekszik, felnéz, és addig dolgoz egy jelenetet, amíg a kompozíció megfelelőnek nem tűnik.
Kép:Tracy Calder
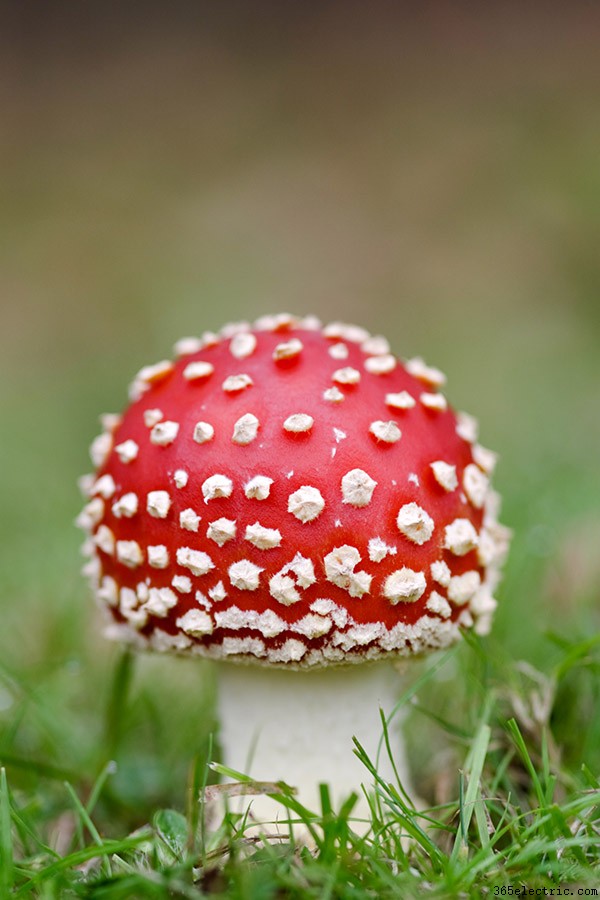
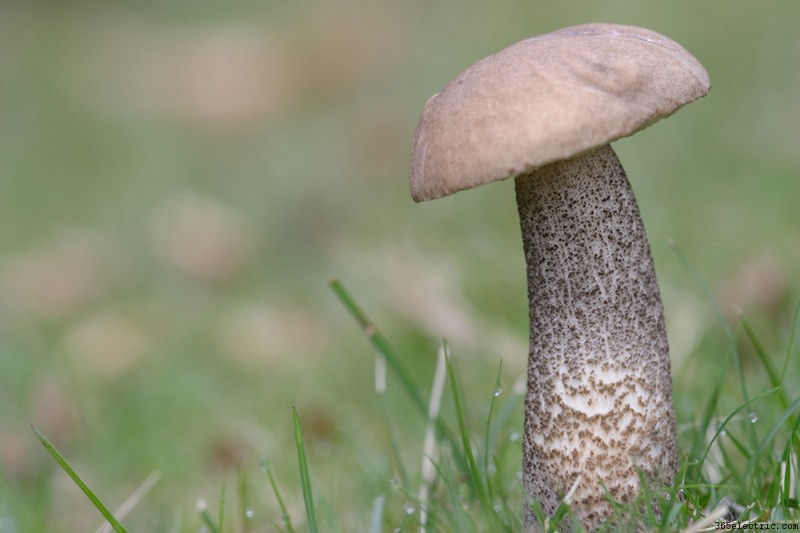
3. Kísérletezzen a tájékozódás
valIdővel sokunkban kialakulnak fotózási szokásaink – ezek egy része hasznos lehet, és személyes stílusunk részévé válhat, míg mások meggátolhatnak minket a kísérletezésben és a fejlődésben. Az egyik szokás az, hogy bizonyos témákat bizonyos fényképezőgép-tájolásokkal párosítanak:gombák függőlegesek, tájak vízszintesek stb. Bár ez gyakran működhet, fontos, hogy néha szakítsunk ezzel a szokással, és fedezzünk fel minden lehetőséget.
Kép:Tracy Calder
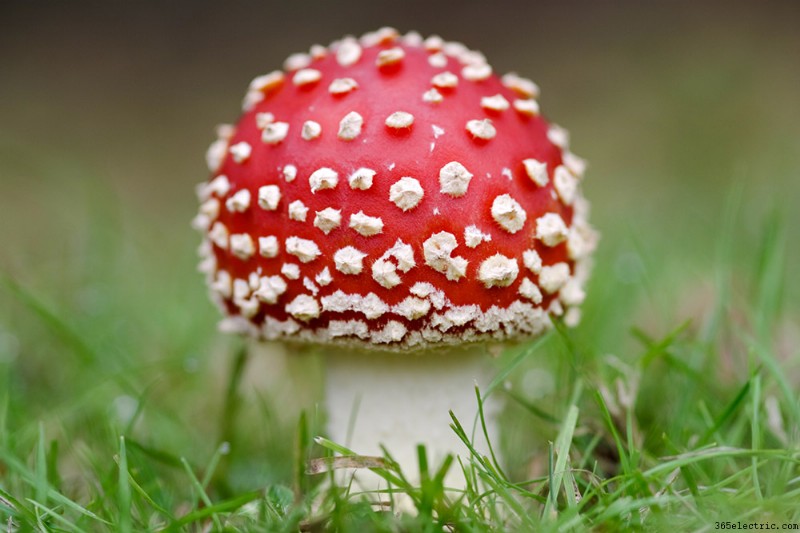
Kép:Tracy Calder
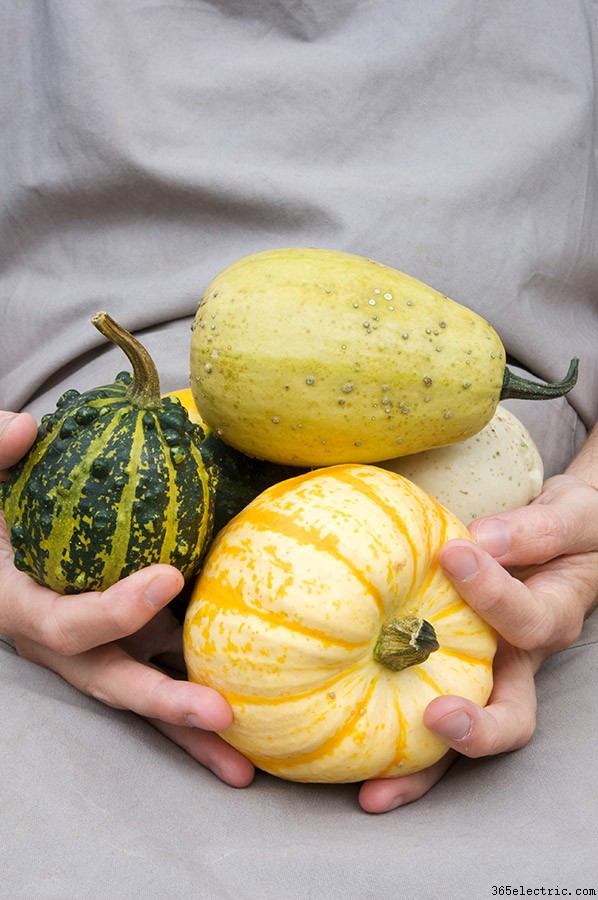
4. Ünnepeld a betakarítás
atAz almának, a szedernek, a töknek, a körtének és a dísztöknek ősszel van szezonja, ezért hozza ki a legtöbbet ebből a bőséges termésből, és próbálja ki magát étel- vagy csendéletfotózáson. Ellátogathat egy helyi termelői piacra, megvásárolhatja azt, ami felkelti a szemet, majd leforgathatja csendéletként, vagy dokumentálhatja az elkészítési és elfogyasztási folyamatot. Vagy készítsen egy betakarítási eseményt, például almapréselési napot, szüreti fesztivált stb.
Kép:Tracy Calder
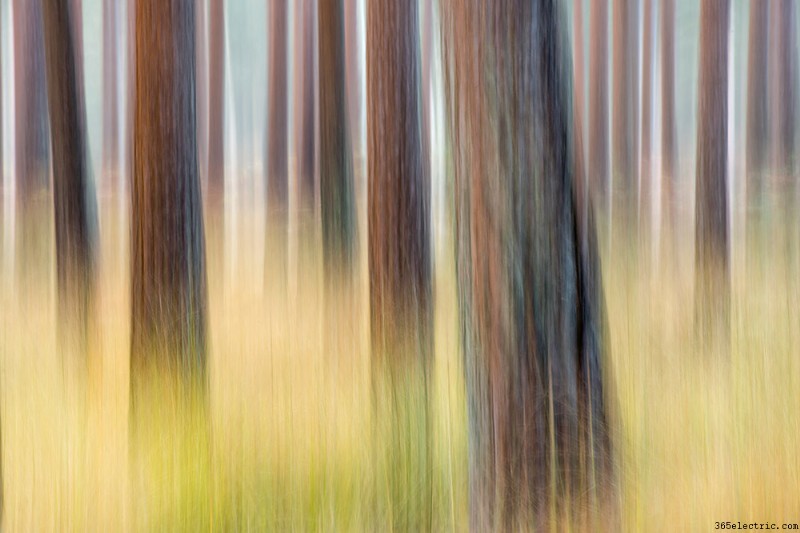
5. Kísérletezzen az ICM
valAz ősz remek alkalom az ICM-mel (Intentional Camera Movement) való kísérletezésre. A fényképezőgép mozgatása, miközben a zár nyitva van, gyönyörű, impresszionista képeket eredményezhet, amelyek kellemes helyérzéket közvetítenek. Mielőtt elkezdené, próbáljon képet alkotni művészi szándékáról. A kamerát többféleképpen mozgathatja:pásztázhat függőlegesen, vízszintesen vagy átlósan, elforgathatja a kamerát, vagy esetleg csak szabálytalanul mozgathatja. Nyilvánvaló, hogy a redőny nyitva tartási ideje közvetlenül befolyásolja az eredményt, ezért lehet, hogy 1/2 másodpercnél kezdje, és onnan építsen. (Ha erős nappali fényben fényképez, előfordulhat, hogy ND szűrőt kell használnia a lassabb zársebesség kényszerítéséhez.)
Kép:Ross Hoddinott
6. Mesélj egy történetet
Legtöbben ismerjük a történetet közvetítő vadképeket – a diót gyűjtögető és zsákmányukat a föld alá temető mókusok, vagy a seregélyek látványos kiállításokat készítenek az elhagyott épületek felett –, de ha alaposan megnézzük, a növényeknek, gombáknak és más statikusabb témáknak is vannak történetei. elmondani. Egy kisebb növény felé hajló nagy növény úgy nézhet ki, mint egy szülő, aki megvédi a gyermekét. Keresse meg ezeket a történeteket, és szilárd technikával rajzolja meg őket.
7. Keresse a csontvázak
atA csontvázlevelek mesés témája lehet beltéri fotózásnak, amikor rossz időre fordul. Dönthetsz úgy, hogy egy fénypárnára lőd le őket (egy kis kézműves változat meg fogja tenni a feladatot). Nehéz lehet találni egy tökéletesen megőrzött levélvázat a vadonban, ezért fontolja meg, hogy „készítsen” egyet otthon – a YouTube-on vannak videók, amelyek végigvezetik a folyamaton. Megpróbálhat más növényeket is megvilágítani fotogén szerkezetekkel.

Kép:Tracy Calder
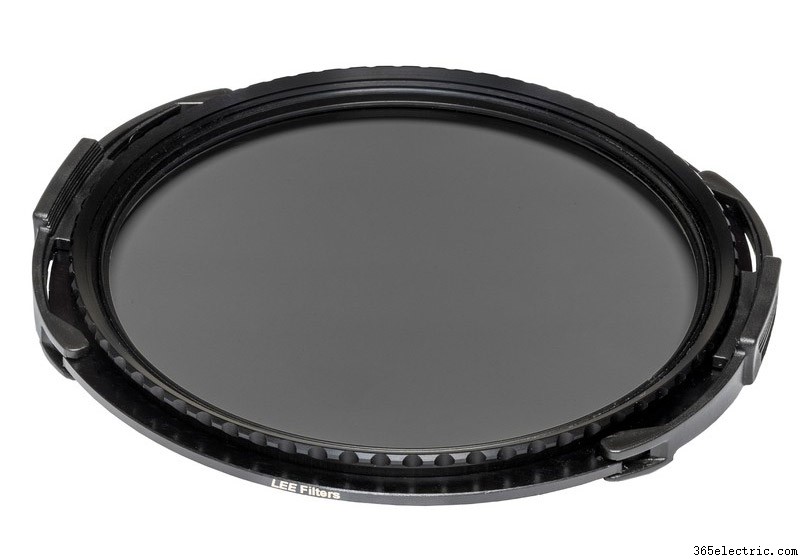
8. Polarizáló
A polarizátor használata az őszi lombok fényképezésekor csökkentheti a levelek tükröződését, felerősítheti a természetes színeket és csökkentheti a ködöt. Egyszerűen forgassa el ezt a szűrőt, amíg el nem éri a kívánt mértékű polarizációt.
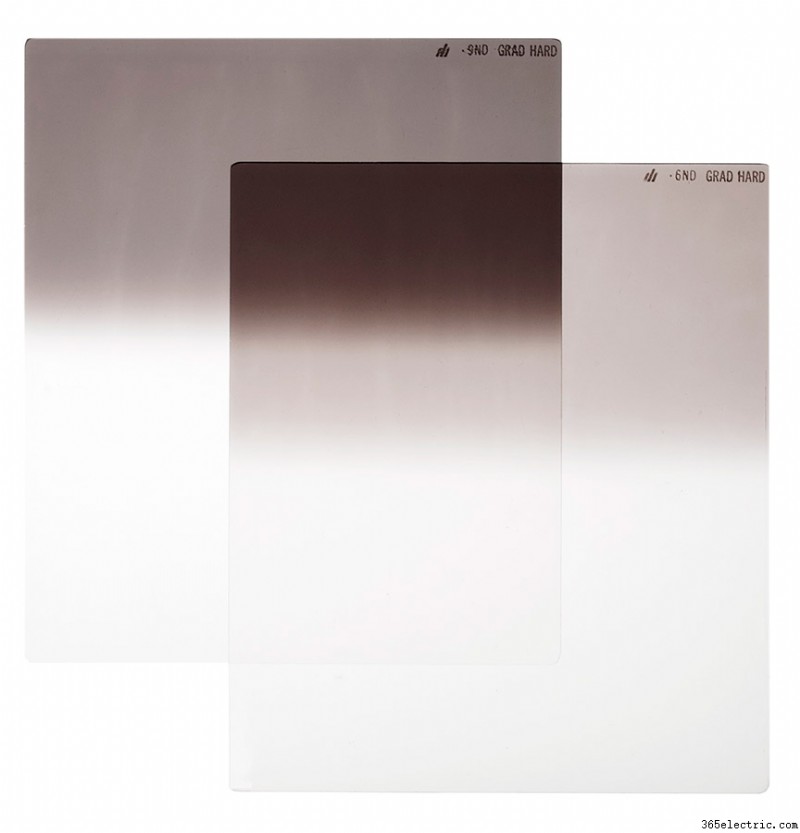
9. Semleges sűrűségű szűrő
Az ND szűrők csökkentik a fényképezőgép érzékelőjét érő fény mennyiségét, így lassabb záridőt tesznek lehetővé – ez ideális ICM fotózáshoz, vagy amikor a vizet lágy elmosódásra szeretné csökkenteni.
10. Fénypárna
Ha az időjárás túl zord ahhoz, hogy kimenjen a szabadba, próbáljon meg áttetsző témákat fénypárnán fényképezni. CutterPillar Glow néven ismert crafters táblát használok, amely három különböző LED-es fényerővel rendelkezik.

11. Ellenőrizze a foltokat
Ha közeli felvételeket készít az őszi lombokról, győződjön meg arról, hogy a kiválasztott példányok tökéletesek. Vizsgálja meg őket, nincs-e rajta szakadás és folt – ami szabad szemmel apró nyomnak tűnik, az a végső képen felnagyítottnak és rendkívül zavarónak tűnik. Hasonlóképpen ellenőrizze, hogy a keret szélein vannak-e olyan elemek, amelyek rontják a témát – a fűszálak, gallyak és zavaró színek észrevétlenek maradhatnak, amikor a fő témára koncentrál.
Kép:Tracy Calder
12. Keresse a természetes kereteket
Az egyszerűbbre redukált fákkal a törzsek, végtagok és ágak kiváló természetes keretező eszközökké válhatnak. Függetlenül attól, hogy vízesést, tájat vagy ember alkotta építményt, például szobrot fényképez, a keretező eszközök a képbe vezethetik a nézőt, és nagyobb mélységérzetet kelthetnek. When you’re using this compositional tool, it’s important to make sure that the framing device has a natural connection to the main subject and does not distract from it.
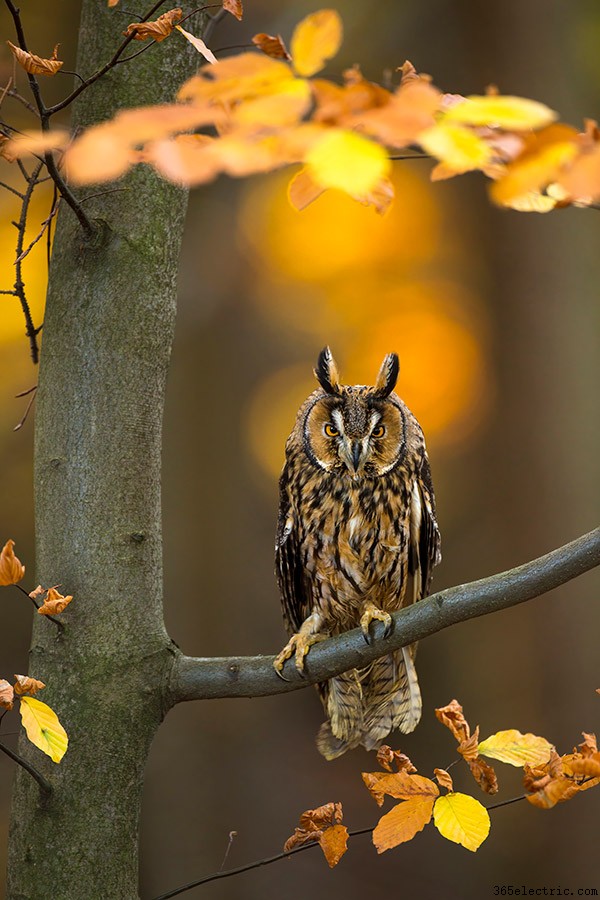
Image:Ben Hall
13. Ease the burden
Obtaining a worm’s-eye view of plants and detritus can be uncomfortable, but you can ease this by using a foldable sitting mat and/or waterproof trousers. Just as wildlife shots gain greater impact when you get down to an animal’s eye level, it’s a good idea to imagine plants and fungi have eyes and do the same! For shots like this I like to use a beanbag, although I’ve also taken a child’s swimming armband to seriously boggy places.
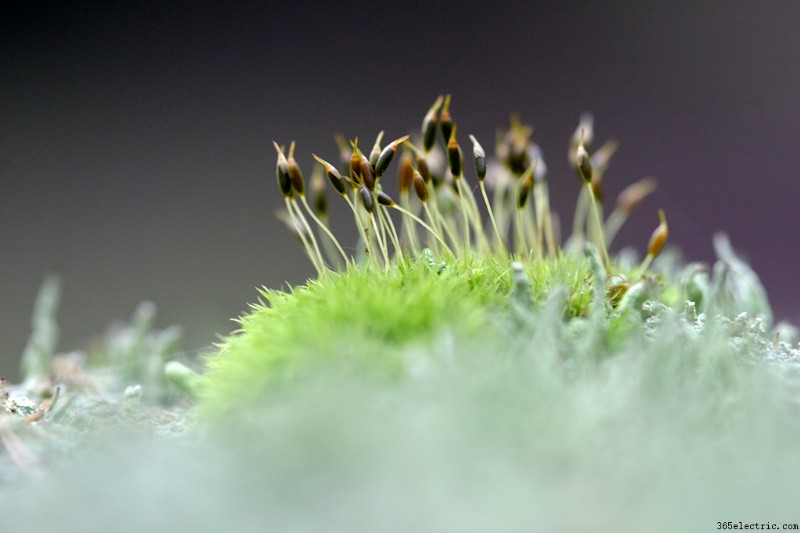
Image:Tracy Calder
14. Try a portrait
We’ve all seen pictures of children throwing autumn leaves into the air and watching them fall to the ground like confetti. We’ve also seen pictures of couples walking down wide, tree-lined paths huddled together against the chilly air. These might be photographic cliches, but with some pre-planning there are plenty of opportunities to create unique portraits that make the most of this season’s attributes.
You could try shooting contre-jour (into the light), for example, or maybe take advantage of directional shafts of light as they fire between gaps in the trees. In addition, use colour theory to plan outfits and props – orange and green are considered complementary colours, for example, so maybe pair a green jumper with orange leaves.
15. Watch the weather
Overcast days are great for autumn photography because cloud cover reduces contrast and makes leaf colours appear rich and saturated. The absence of direct light on foliage also reduces glare. (Remember to exclude the sky where possible as this tends to be white and featureless on overcast days.)
When the wind speed rises above 10mph, leaves and flowers leap about, which makes macro photography quite a challenge, so unless you want to intentionally include blur in your photographs, check the forecast first. (You’ll also want to pay close attention to the weather if you’re hoping for fog or mist on a morning shoot.)
Whether you’re hoping to shoot in mist, overcast light, low wind or raking light, a good weather app is invaluable. Try AccuWeather, which features up-to-the-minute reports.

Image:Tracy Calder
16. Do your research
Being able to identify what you’re photographing has several advantages:firstly, it helps you to find similar subjects and species in the future – fly agaric toadstools often thrive under birch trees, for example, which narrows things down – secondly, it helps you to label and caption your images, and thirdly the more you know about a subject the more it will inform the way that you photograph it. There are plenty of printed guides out there, but online apps can be particularly helpful for identifying subjects in the field.
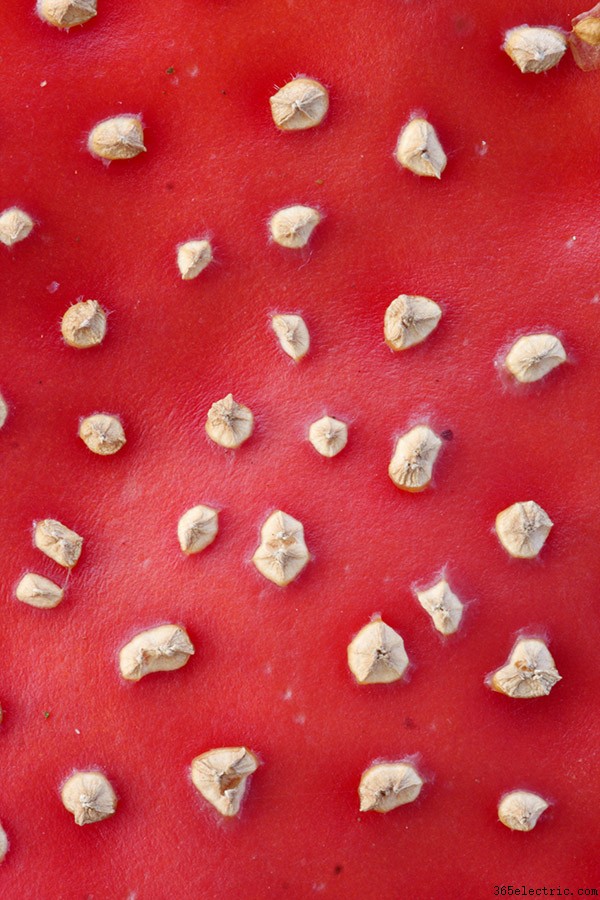
Image:Tracy Calder
17. Emphasise texture
Peeling bark, weathered wood and the spiky cases of horse chestnut seeds make for wonderful autumnal subjects, but to emphasise their texture and form you need the right kind of lighting. Strong, directional light is preferable, so plan your shoot for early or late in the day when the position of the sun will result in strong side lighting.
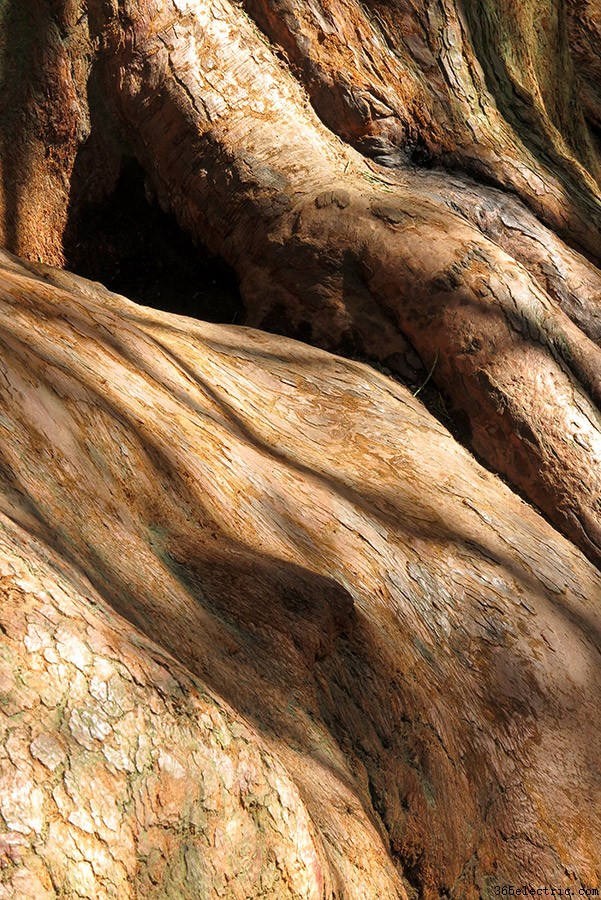
Image:Tracy Calder
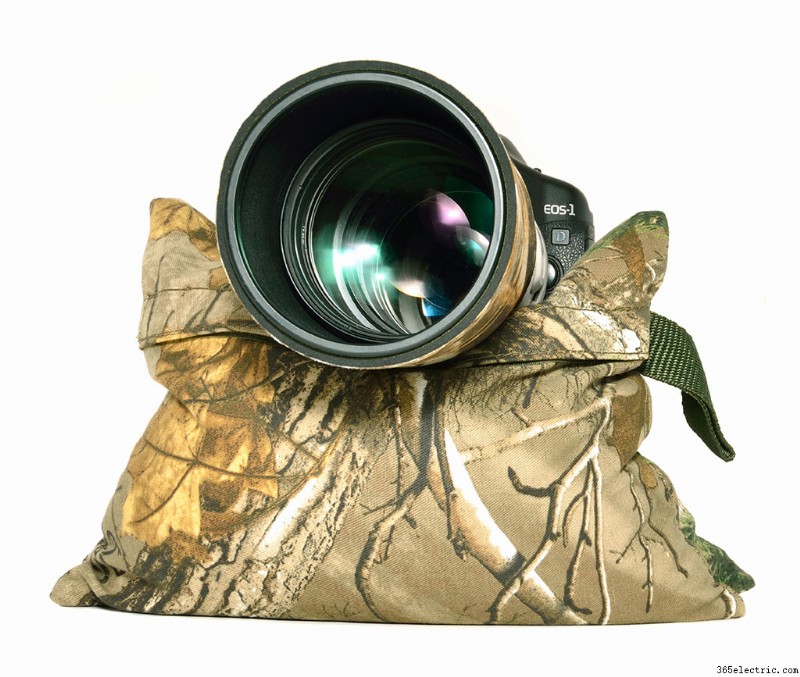
18. Beanbag
When you’re shooting subjects close to the ground, a beanbag can provide great support. Bags can be purchased filled or unfilled, with lining or without – try Wildlife Watching Supplies.
19. Artist’s colour wheel
An artist’s colour wheel can help you to plan outfits and props for an autumn portrait shoot. Orange and green work well together, as do blue and yellow.

20. Revisit old venues
You may have shot a certain landscape hundreds of times, but the chances are that if you haven’t photographed it in autumn then you’ve probably been missing out.
21. Search for wildlife
While many birds fly south during autumn, whooper swans and many varieties of duck, geese and wading birds spend the autumn/winter in the UK. It’s relatively easy to get frame-filling shots of swans at wetland centres such as Slimbridge where birds are given food at set times. When it comes to mammals, red deer are a firm favourite. You might decide to capture a deer silhouette in the evening when the sun is low in the sky, or perhaps a cloud of breath leaving a stag’s mouth on a chilly morning. (The British Deer Society has published an excellent Code of Conduct on its website with advice including using a lens with a focal length of 300mm or more – www.bds.org.uk.)
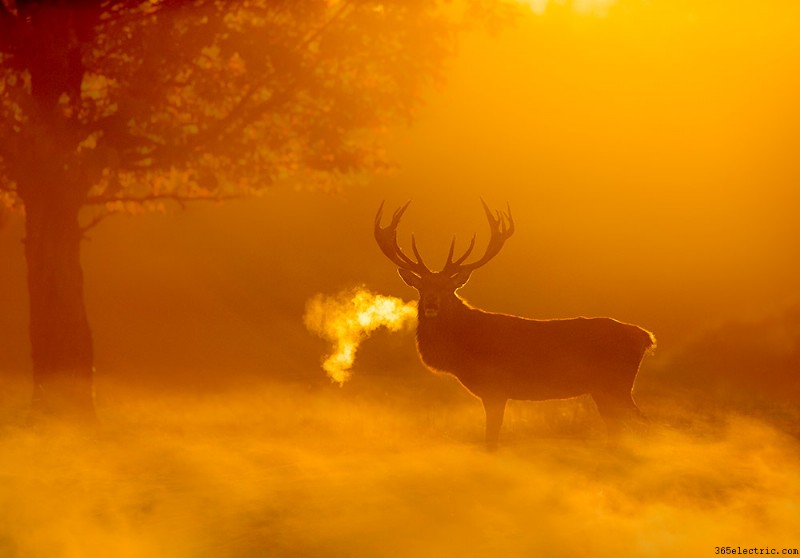
Image:Ben Hall
22. Think in multiples
Many DSLRs now have an in-camera multiple exposure function. As a result, combining two or more exposures in one image has never been easier. You can usually combine a ‘live’ image with one already stored on your memory card, which results in plenty of opportunities for getting creative. Autumn is a great time to experiment with this technique because you can combine colourful abstracts with shots of more structural subjects such as skeletal trees.
23. Introduce movement
Reducing running water to a silvery blur, while surrounding foliage remains sharp and full of colour, is a nice way to introduce contrast and order to otherwise chaotic autumn scenes. In order to do this, you might need an ND filter to force a slow shutter speed. (If you are shooting on a dull day or at dawn or dusk you might not need the filter). Mount your camera on a tripod and start with one second or longer. You could also try a similar thing with leaves moving in the breeze and a static element such as a tree trunk or rock to create contrast.
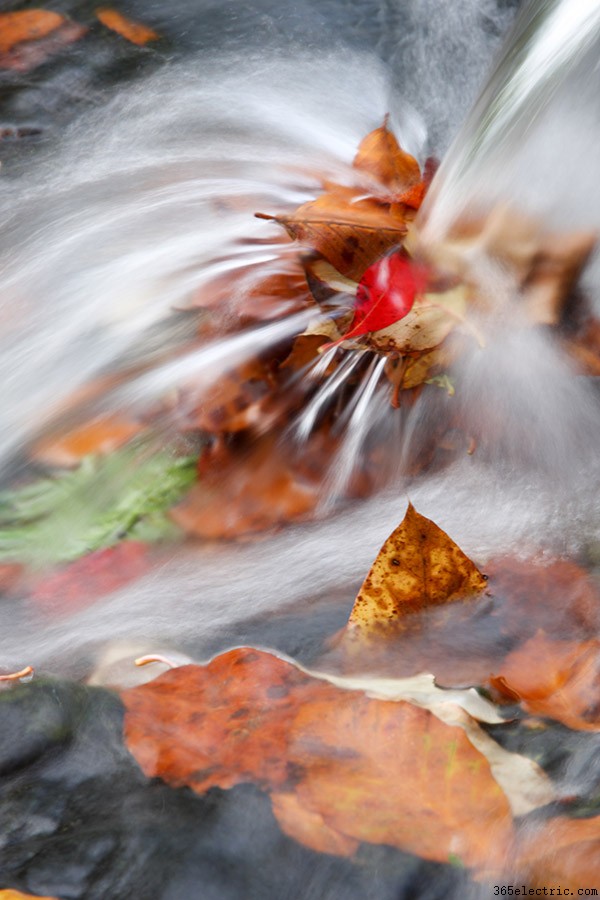
Image:Tracy Calder
24. Mist opportunities
At this time of the year, warm water in the air cools rapidly, causing it to change from gas to tiny visible droplets, in other words, mist. These conditions don’t last long, so you will need to check the weather forecast the night before and head out before the sun rises and it burns off. Scenes dominated by mist often contain a lot of highlights, so consider adding a stop or two of exposure compensation to stop the camera from being fooled into under-exposing the scene. Look out for layers, bold shapes and objects which reveal clear outlines.
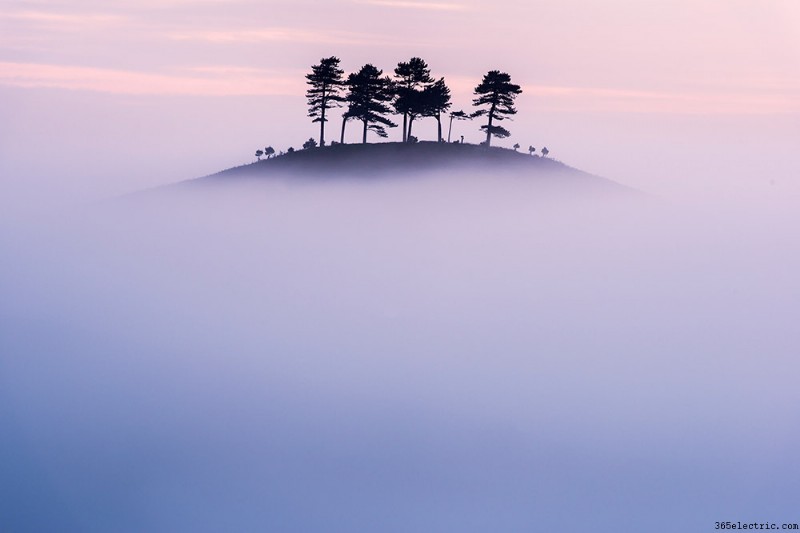
Image:Ross Hoddinott
25. Get reflective
With leaf colour ranging from fiery reds to golden yellows and intense oranges, autumn is the perfect time to shoot painterly reflections in rivers, lakes, ponds and puddles. Autumn colour is triggered by changes in day length and night temperature, so the beginning of this spectacle can vary from year to year. There are groups on Facebook that share up-to-date information on leaf colour and conditions in specific areas so check before you travel.
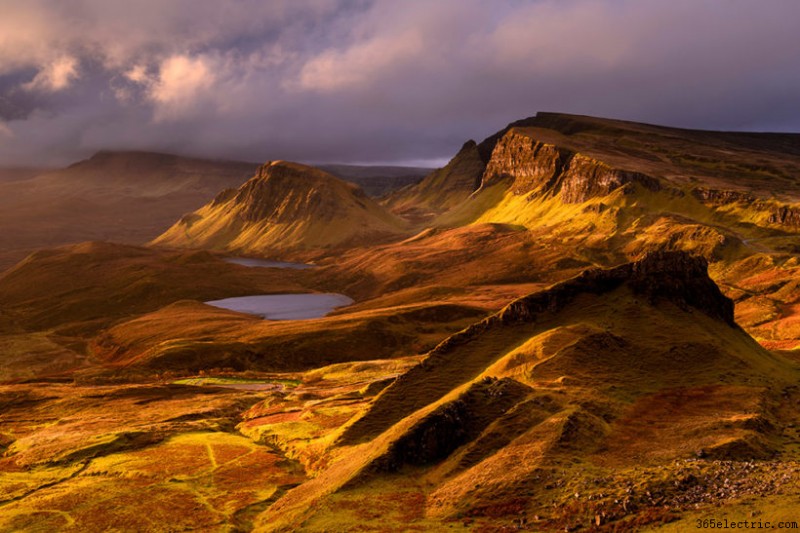
26. Search for gold
Natural light just after sunrise and before sunset is ideal for autumn shots. During this ‘golden hour’ the light is warmer (as measured on the Kelvin colour temperature spectrum) with plenty of yellows, oranges and reds. It’s a great time for shooting landscapes and bringing out the rich spectrum of colours that we often encounter at this time of the year. To ascertain exactly when the golden hour will occur you can use an app such as The Photographer’s Ephemeris or Helios Magic Hour Calculator.

Image:Ross Hoddinott
27. Arrange a flat lay
Shooting objects directly from above can lead to refreshing images that tell the story of a location or season. Chefs say, ‘What grows together, goes together’ and it’s something that can be applied to this type of photography too. If you find some attractive berries, for example, look around to see what else is growing nearby. Are there leaves or brambles that might look good in the composition? When it comes to arranging your treasures, imagine that you are completing a jigsaw – choose a ‘hero’ object and place it in the middle then work on the corners and edges before filling in the gaps with pieces of secondary importance.
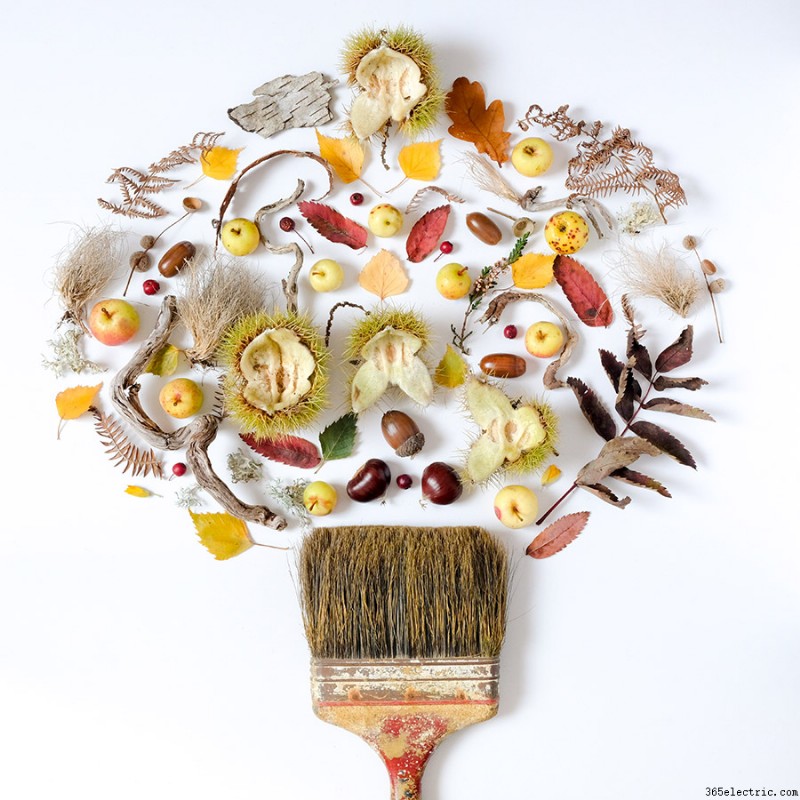
Image:Tracy Calder
28. Telephoto lens
The British Deer Society recommends using a lens with a focal length of 300mm or more for photographing deer. The Canon EF 100-400mm f/4.5-5.6L II USM lens would be ideal.
29. Multiple exposure mode
The Canon EOS R5 has an impressive in-camera multiple exposure function. With this setting you can automatically combine between two and nine different exposures in one image.
30. Get shooting early
Once the autumn colours set in, be sure to capture them quickly. All it takes is one big storm for them to blow off the trees and the opportunity to pass.
Autumn Photography – Essential Gear
 Warm clothes
Standing around in the wilderness while the sun is low in the sky can be chilly work, so make sure you wrap up warm. Particularly as you are likely to be standing still for a long period of time to get that perfect autumn photography snap.
Build up the layers and include waterproofs for when the skies invariably open.
 Wellies
Getting the right angle for your composition can often require standing on ground that is less firm, such as a boggy field – or even in the middle of a stream.
By donning a pair of wellies you can ensure your feet stay warm and dry, no matter where you venture on your autumn photography adventures.
Gloves
If you’re taking pictures your hands are constantly exposed to the elements – instead of nicely tucked away in your pockets – so can very quickly get cold. You need a pair that will still allow you to operate your camera while keeping you warm.
 Consider fingerless pairs or thinner thermal types – some manufacturers, such as Lowepro, even produce specialist photo gloves for this purpose.
Torch
As the light fades it can become difficult to find buttons on your camera or even spare cards inside your camera bag, so have a small pocket torch on you. It can also be handy to light the way on your walk back to the car.
 Tripod / monopod
Long shutter speeds are needed to create a large depth of field, and at dusk or dawn especially you’ll need a steady tripod to avoid camera shake. Chances are that the light is going to drop faster than you’d expect, so ensure that you have some camera support for low-light photography. If you’re serious about your autumn shots, make sure you bring the sturdiest tripod you can carry.
Macro lens
Some of the best images taken in autumn feature the tiny details of nature, so don’t be afraid to pack the macro lens. A macro lens will allow you to focus right in on the detail and capture some stunning colour and texture, making it perfect for plant life and the autumn colours. So make sure you keep one in your kit bag.
 Wideangle lens
This is the most useful lens for your autumn shots because it gives you a nice wide view with the option of a vast depth of field. For APS-C cameras a 10-20mm is ideal, while full-frame users might want a 24mm prime.
Filters
Filters allow you to control the tonal range and bring it within a more even range. By using graduated ND filters you can darken a bright sky, or with solid ND, slow a stream of water into a blur.
 Waterproof cover
When the rain does come down you usually have two choices:put your camera away or get it wet, but with an all-weather cover like the Kata E-690, you can keep shooting whatever the weather.
Tracy Calder

Ex AP-staffer Tracy Calder is a photographer and writer who co-founded Close-up Photographer of the Year (CUPOTY) in 2018. Earlier this year she was awarded a Gold medal from the RHS for her Plant Scars series. Her work has been exhibited at The Photographers’ Gallery, the National Portrait Gallery and the Saatchi Gallery. To see more, visit Instagram @tracy_calder_photo and www.cupoty.com
Need more autumn photography tips? Try these:
Get your best ever autumn landscapes
Get great autumn wildlife shots
Our best-ever close up photography tips